Description
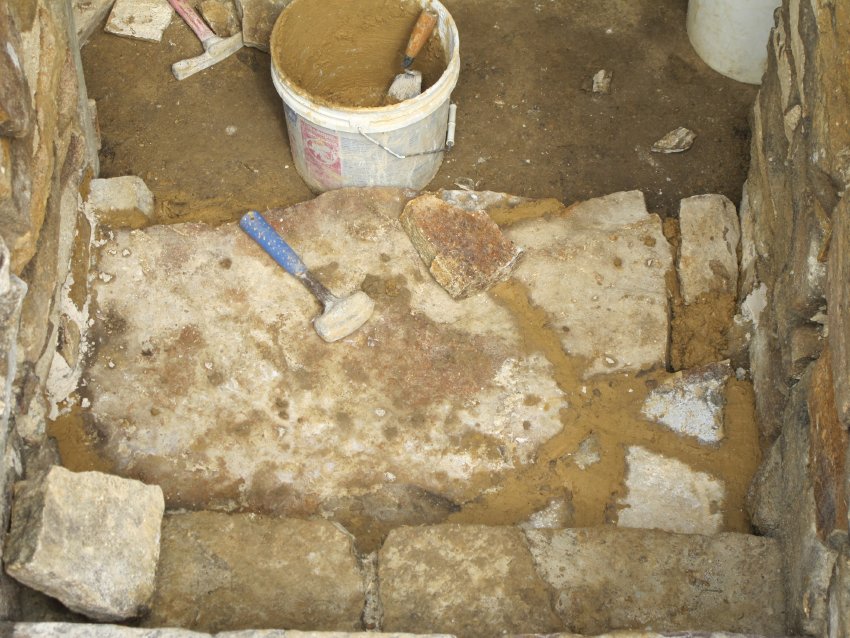
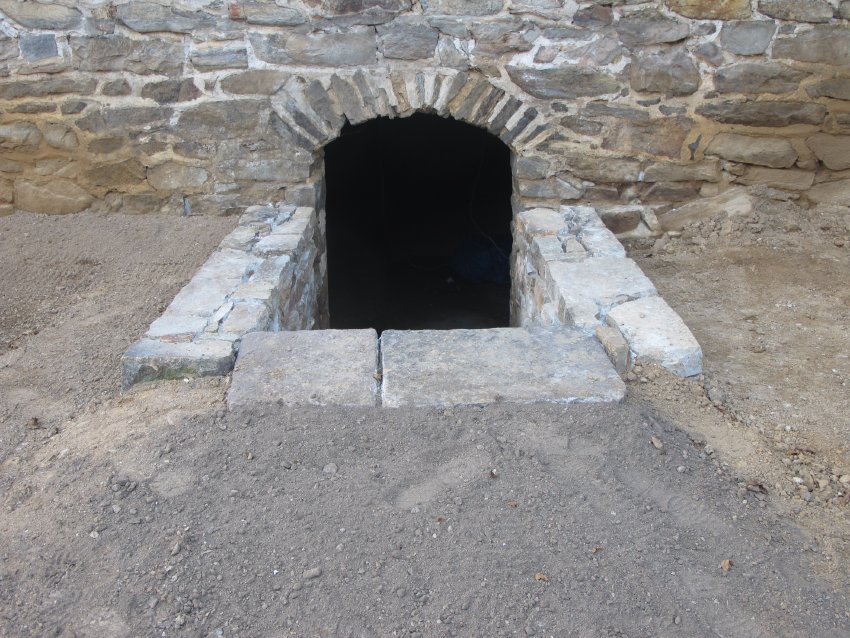
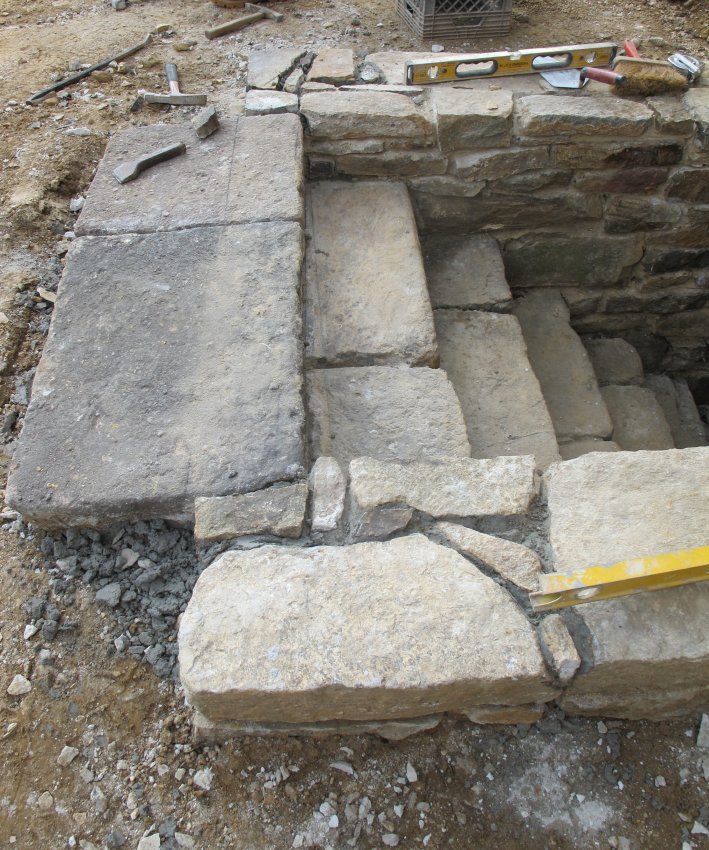
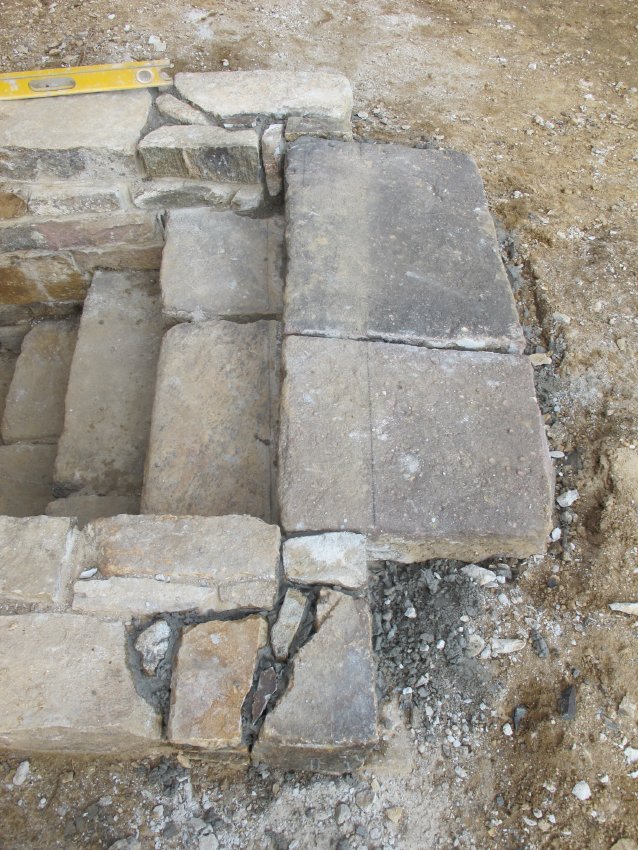
Series of 71 digital photographs showing restoration and reconstruction of stone steps and wooden cellar cap ("bulkhead") and doors for the Keim House cellar entry.
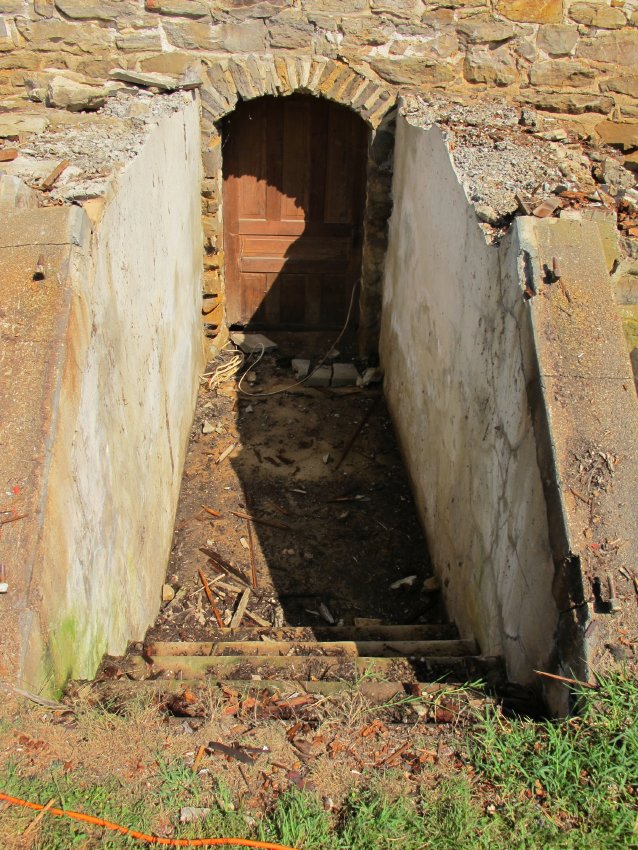
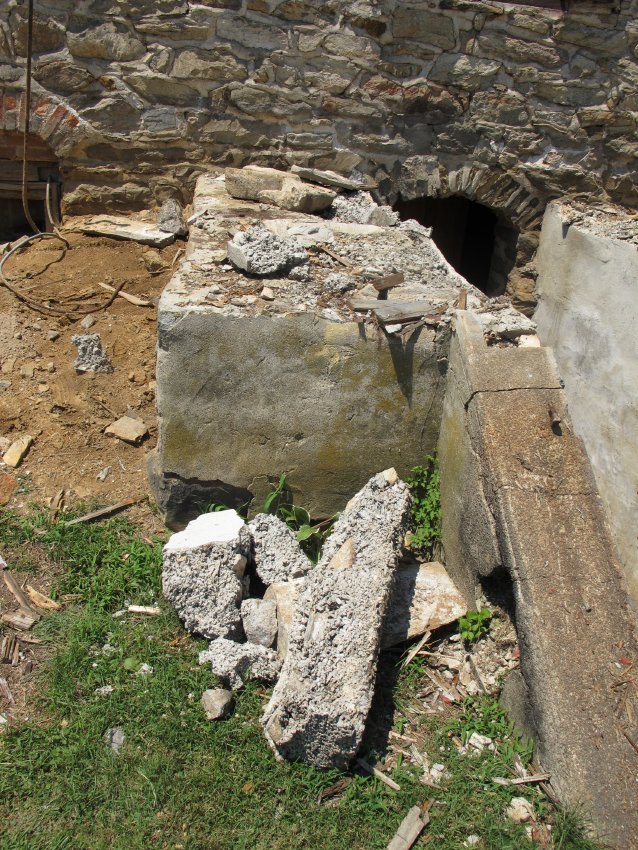
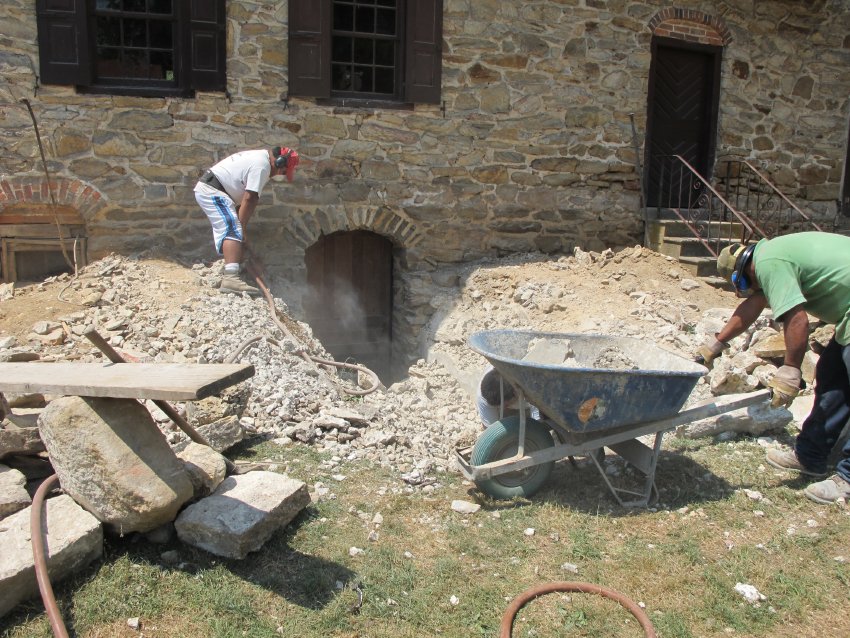
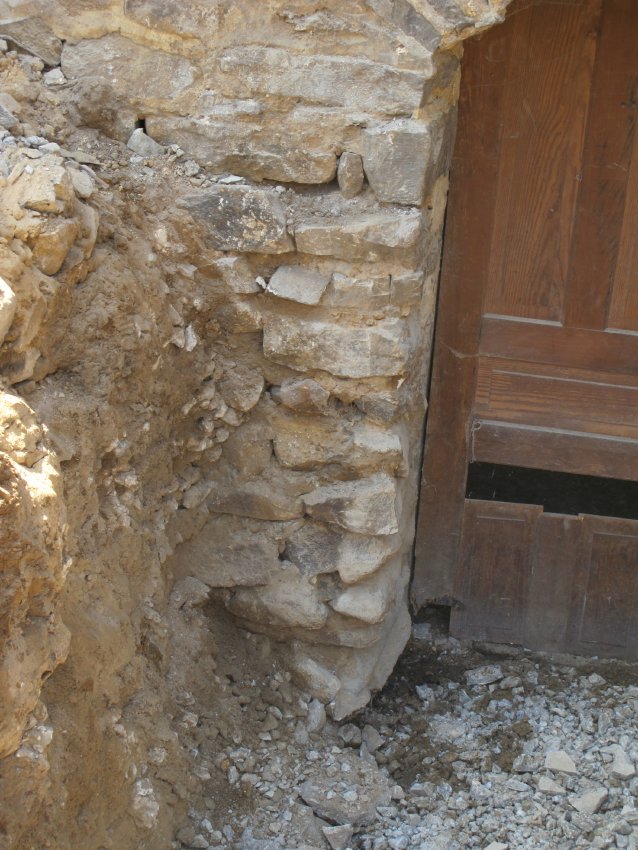
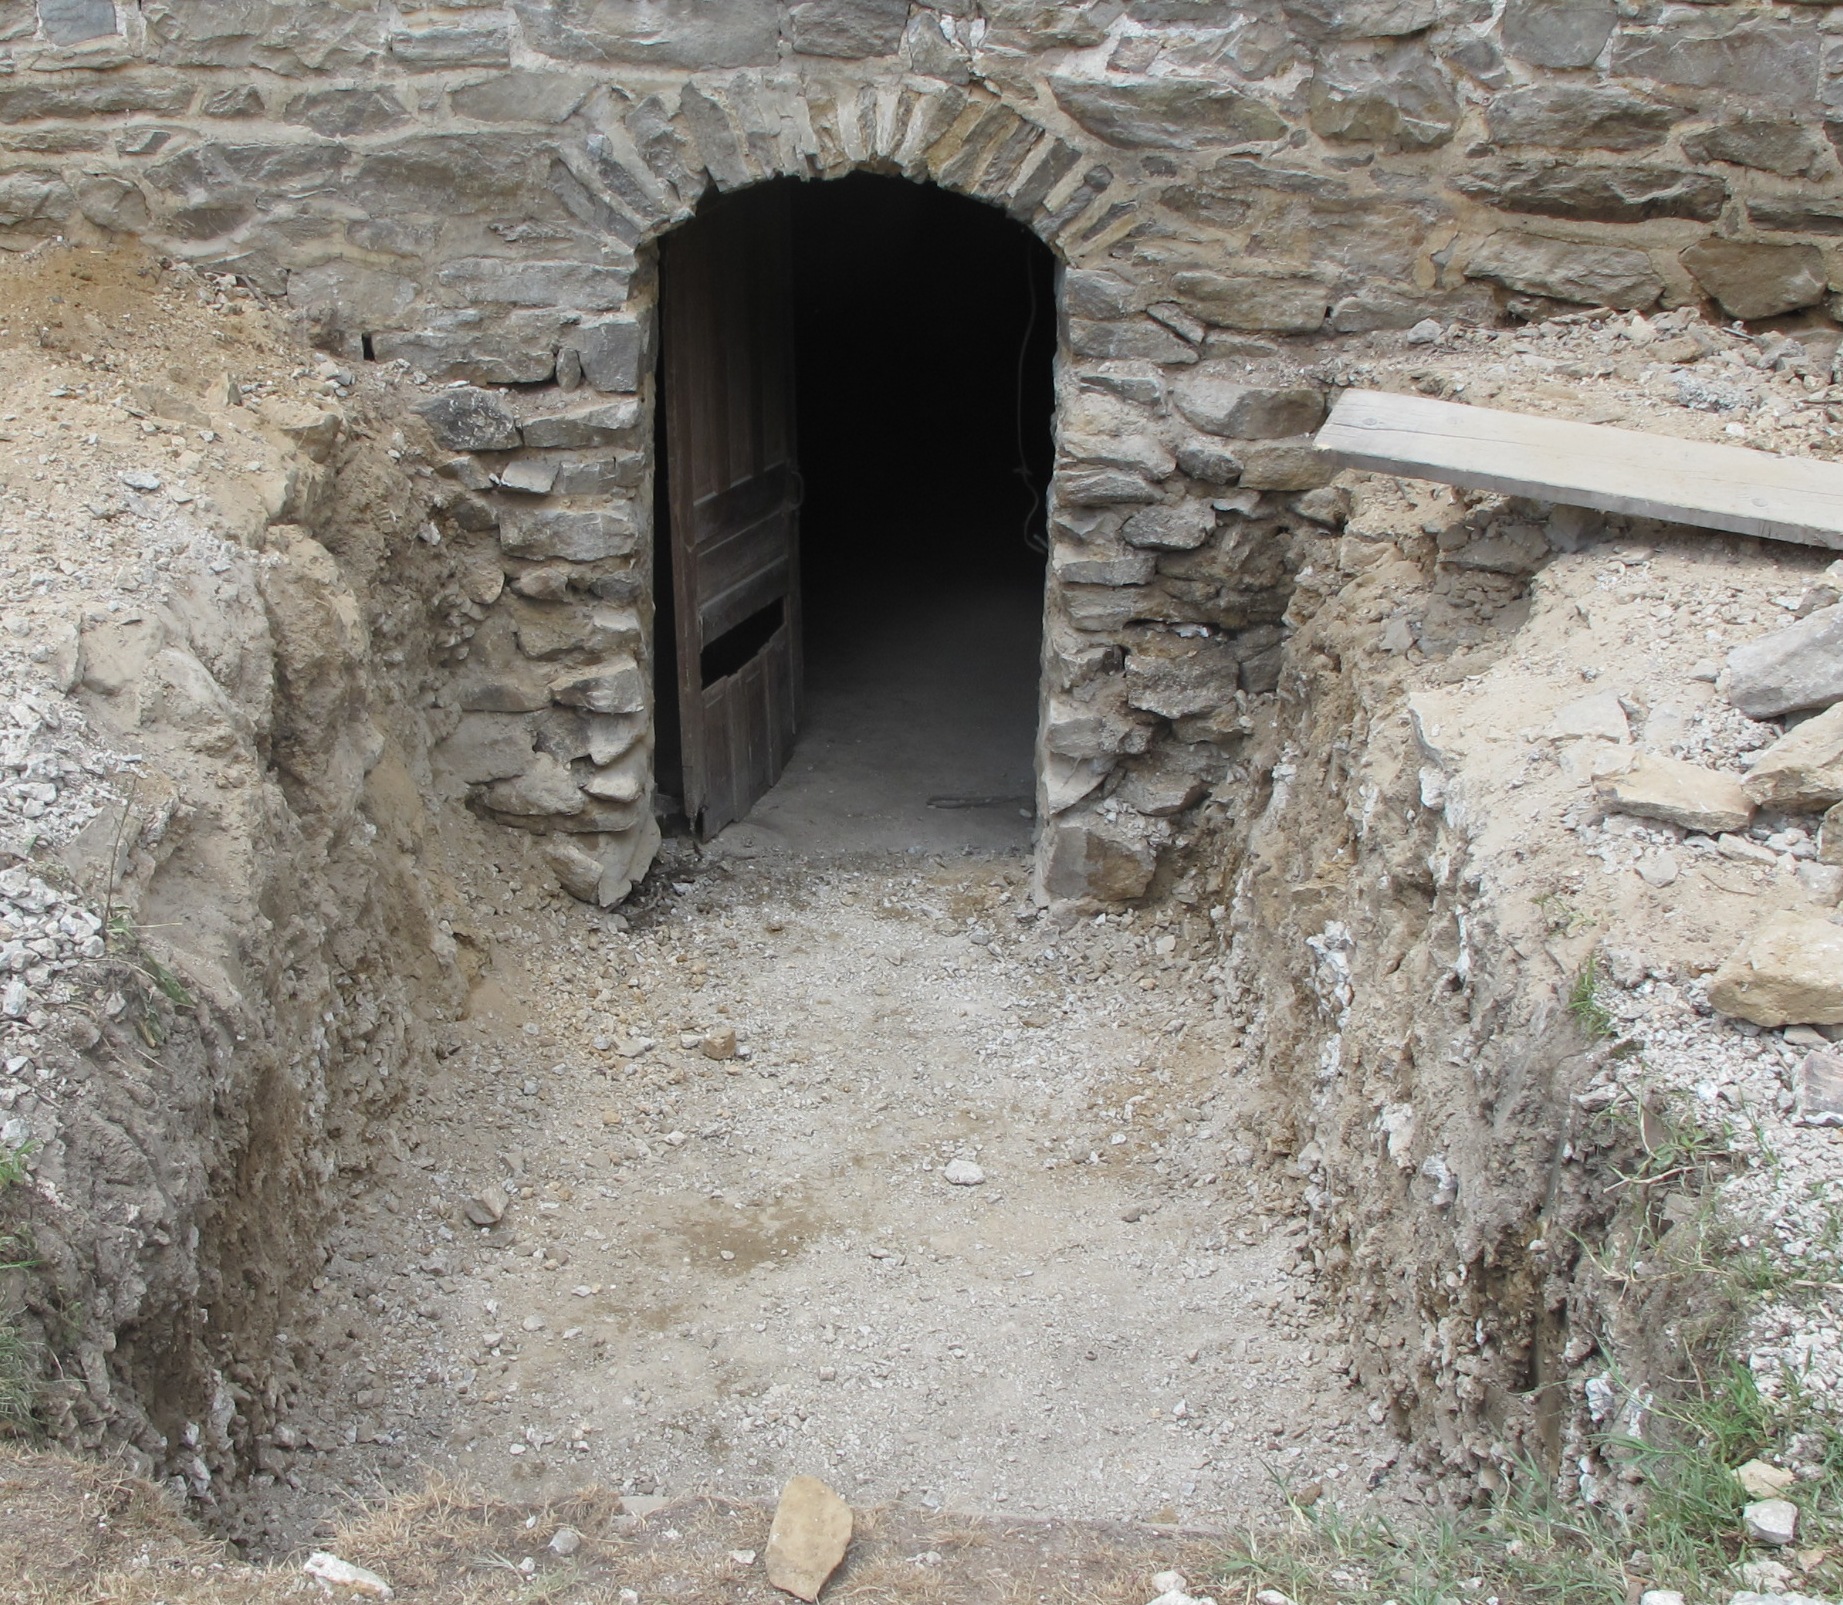
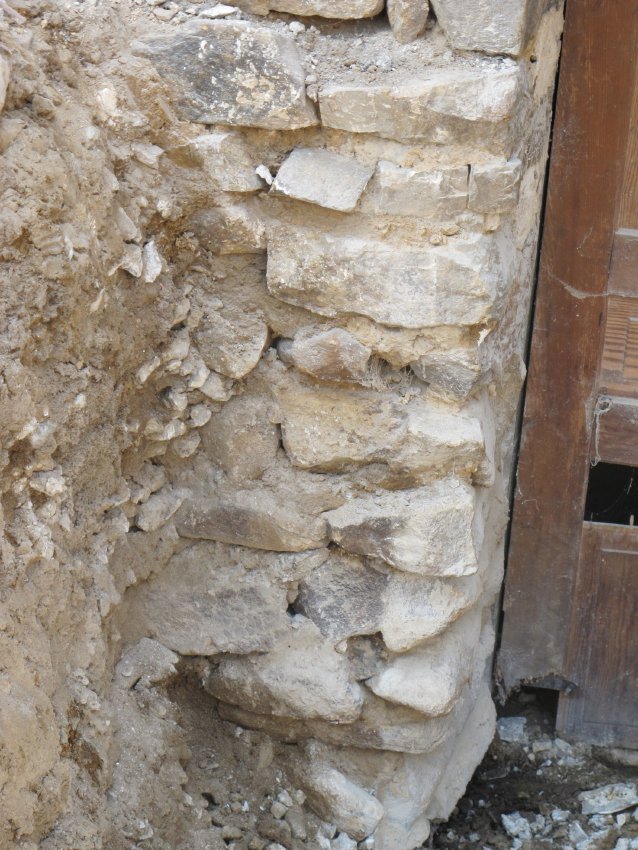
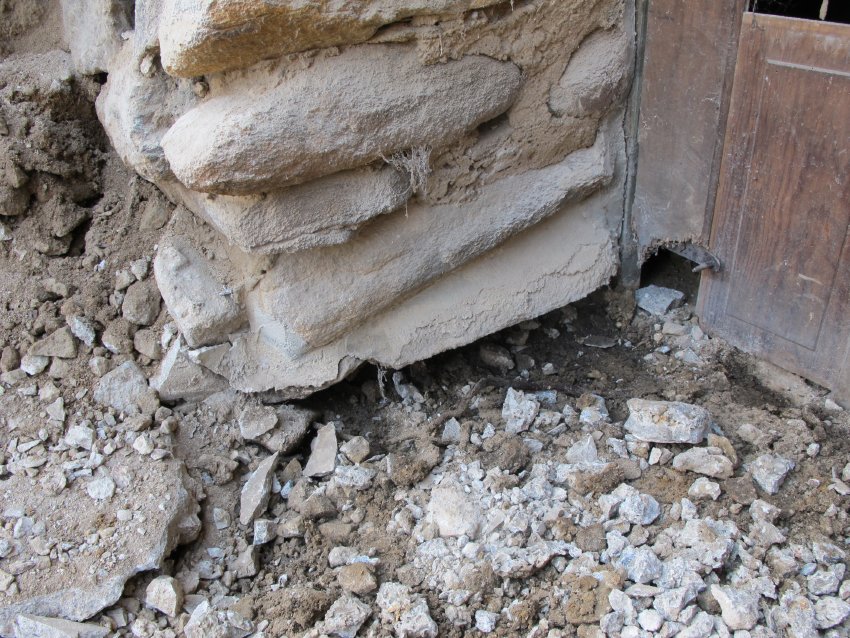
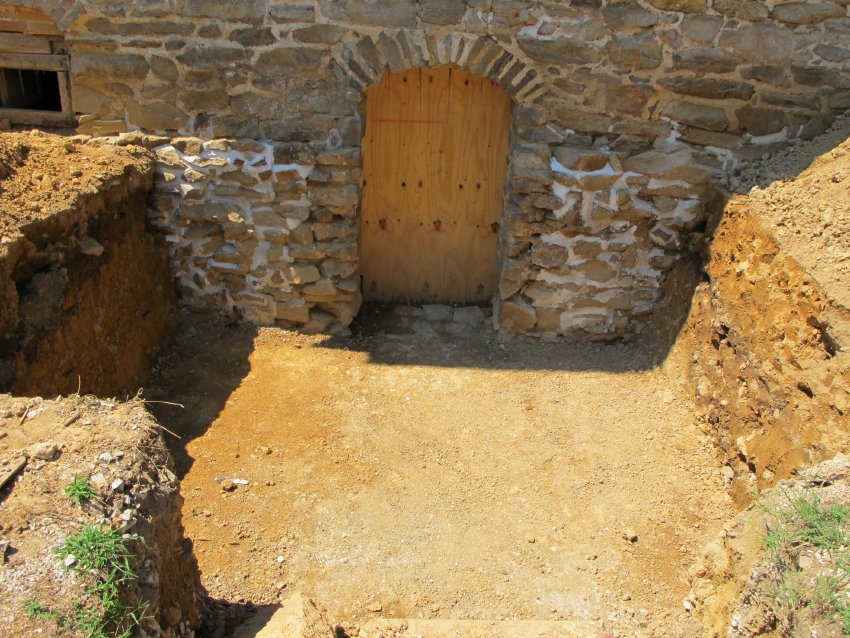
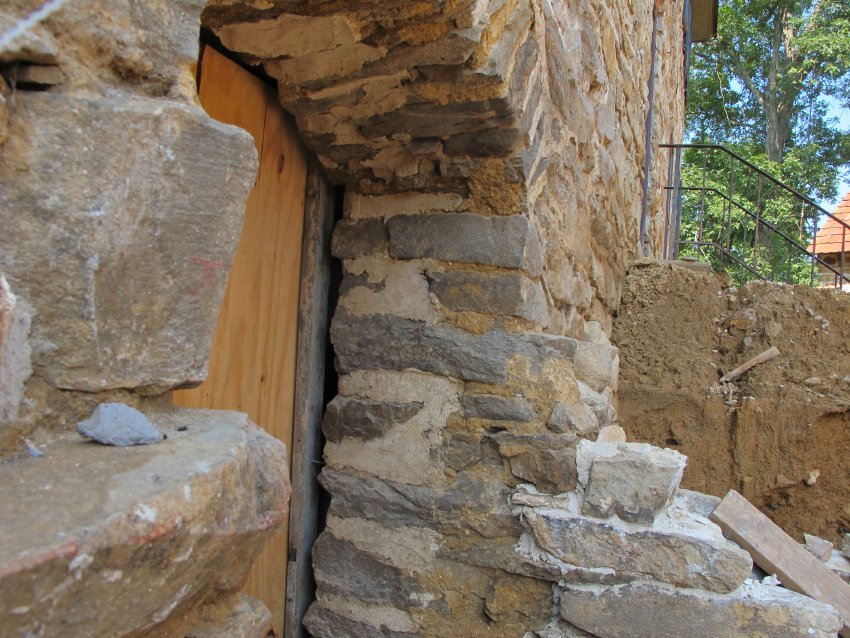
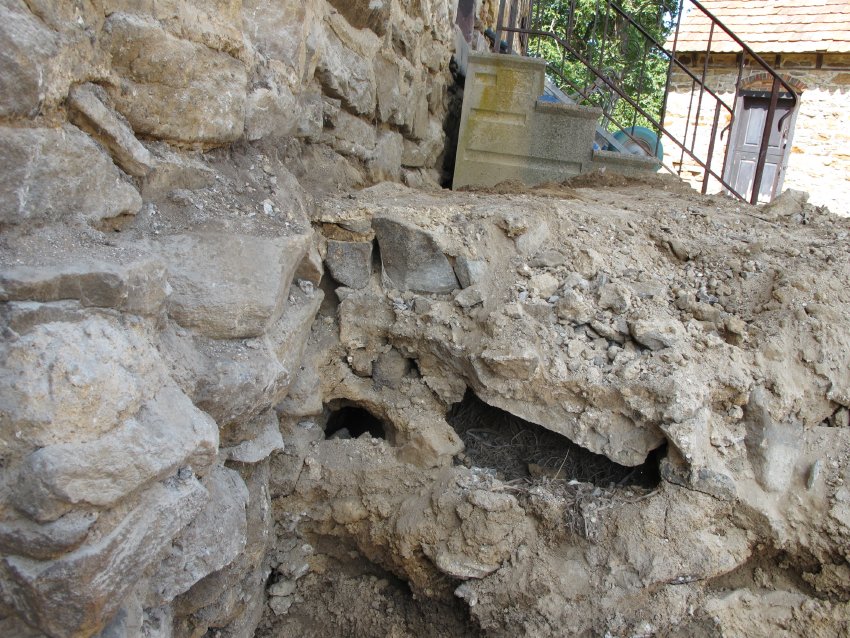
Thus far no evidence has been found for the existence of timber framing for an early door, or a "pintle"(a) attachment sites in the mortar joints, or other structure sheltering the stone-arched opening to the cellar of the original 1753 Jacob Keim House. However, the rough contour of the exterior stonework abutting the opening strongly suggests that parallel retaining walls, extending vertically from the level of the stone sill up to the top of the plinth below the arch imposts(b), were tied into the foundation immediately adjacent to the "doorway" opening. It appears that more than a few of the bond-stones projecting from the doorway abutments were cut off along a common vertical plane, probably to provide a "flush" joint for the heavily aggregated concrete walls installed in the first half of the twentieth century. These massive and intrusive walls were joined to the projecting bond-stones of the 18th century foundation [Image #67, photo 4428], and removed in the July-August, 2011 restoration campaign.
(a) i.e, two doors on 'hooks and hinges' the usage of 'hook' was almost universal in 18th-century construction documents, building accounts, and architectural publications in the mid-Atlantic colonies, long before "pintle," an old English word with varying meanings, became the common term in the 19th century for the pin or shaft on which builders' hinges pivot.
(b) The uppermost horizontal block of the abutment pier supporting an arch. The angled voussoirs (stones or bricks) directly bearing on, and appearing to spring rotationally from the imposts toward the keystone or arch-crest are (for obvious reasons) traditionally called "springers."
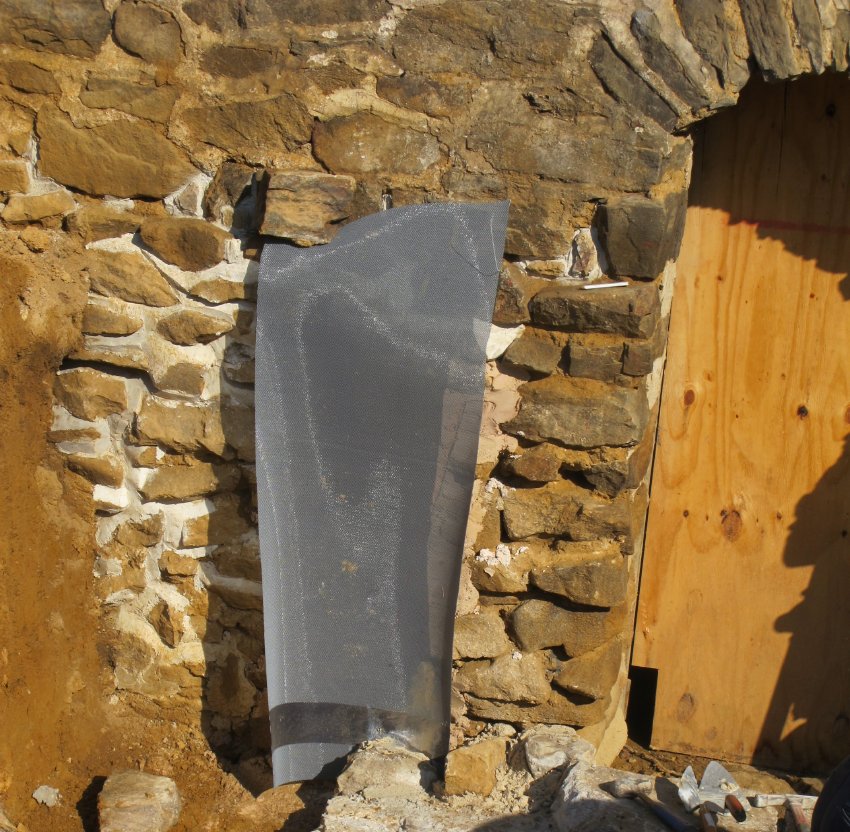
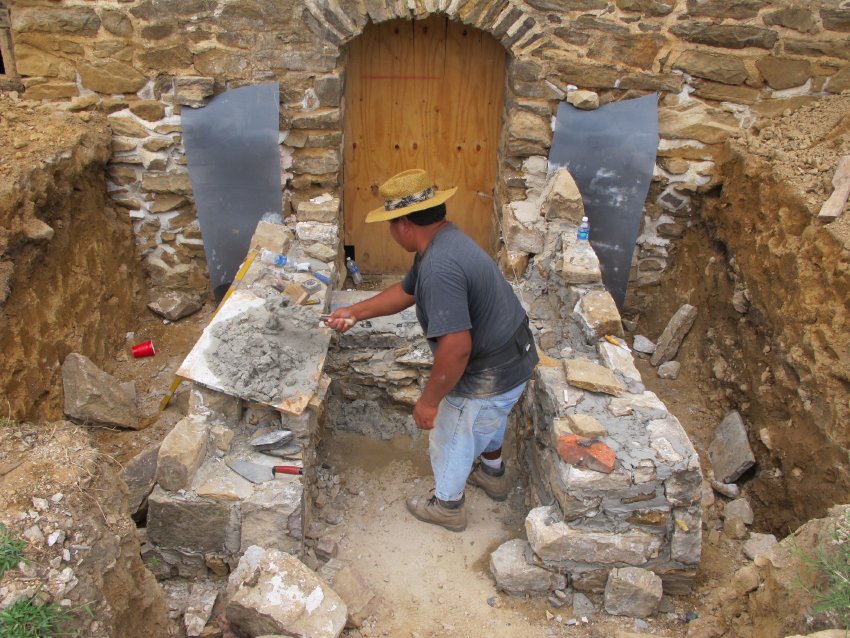
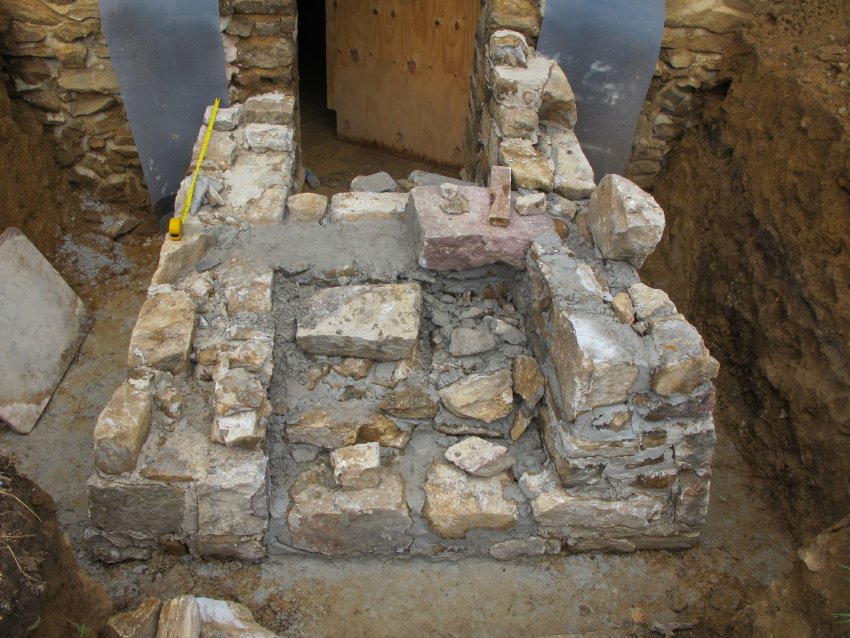
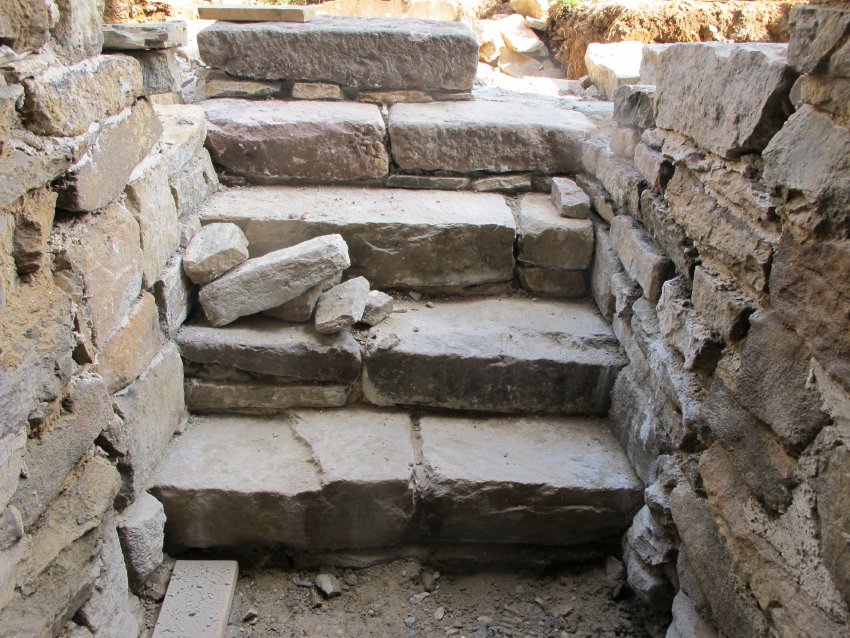
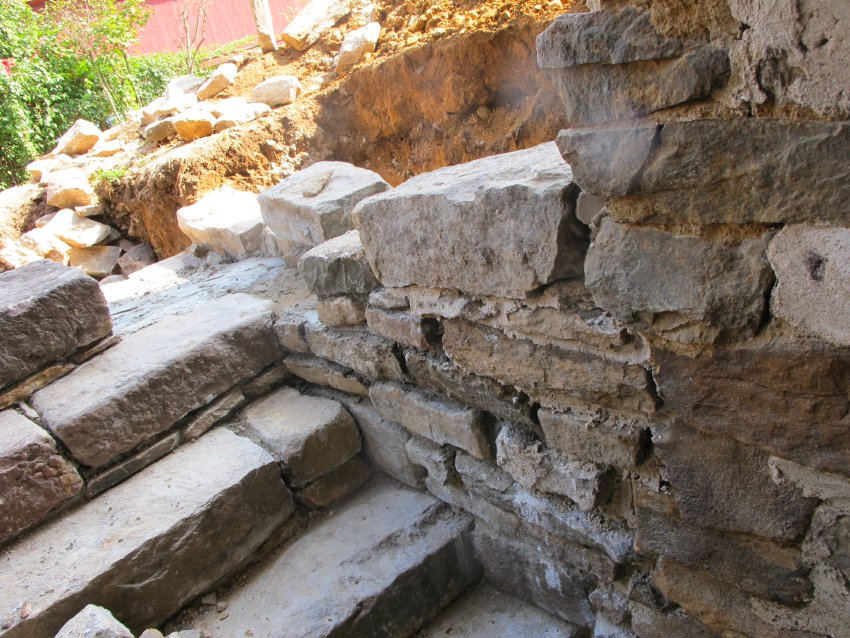
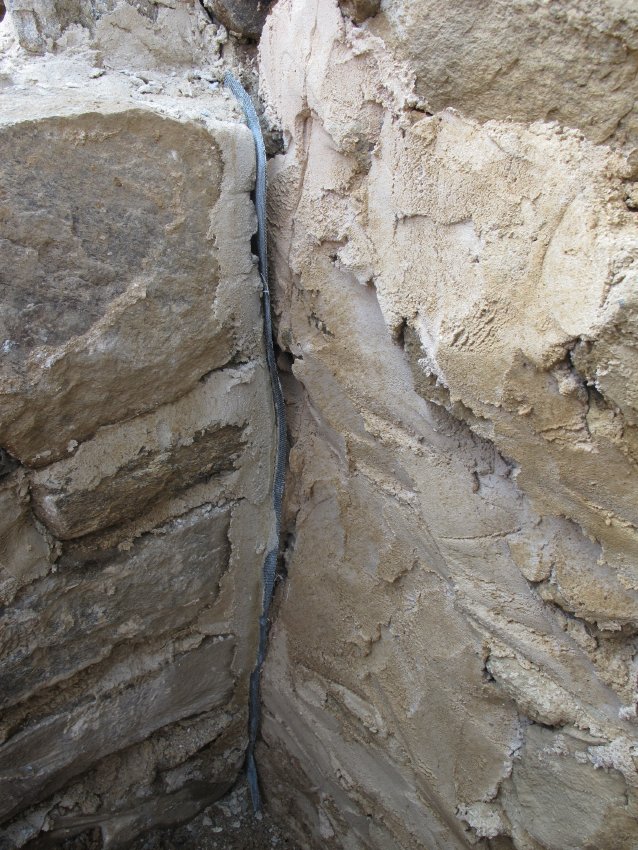
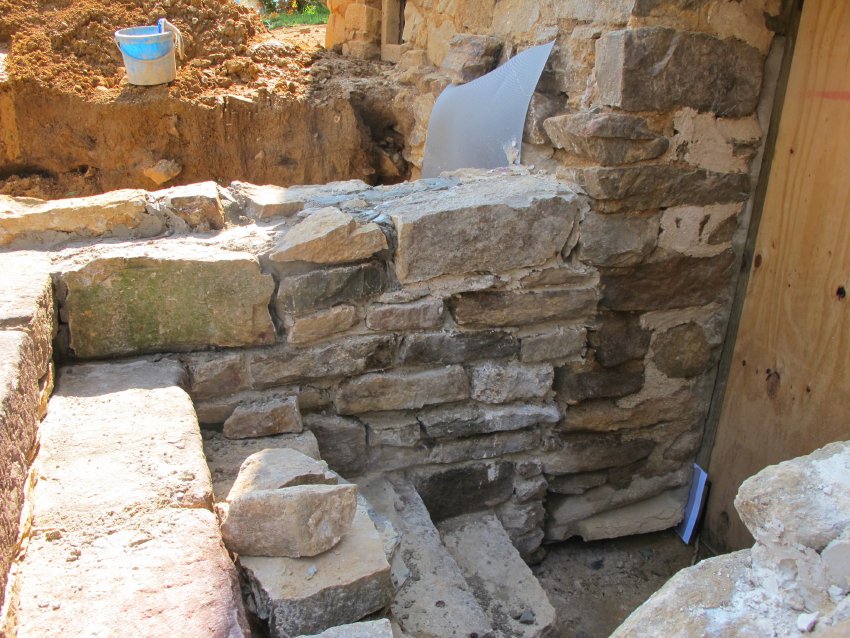
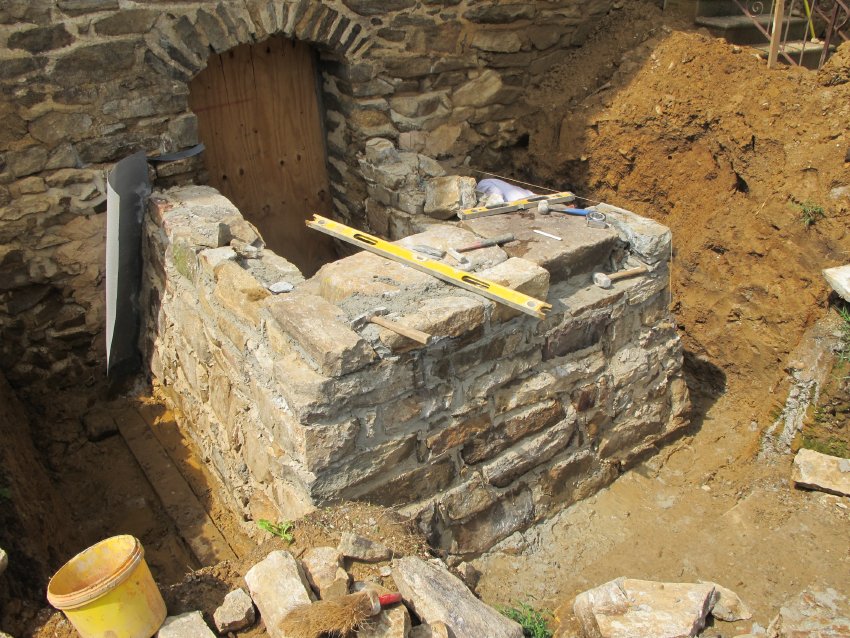
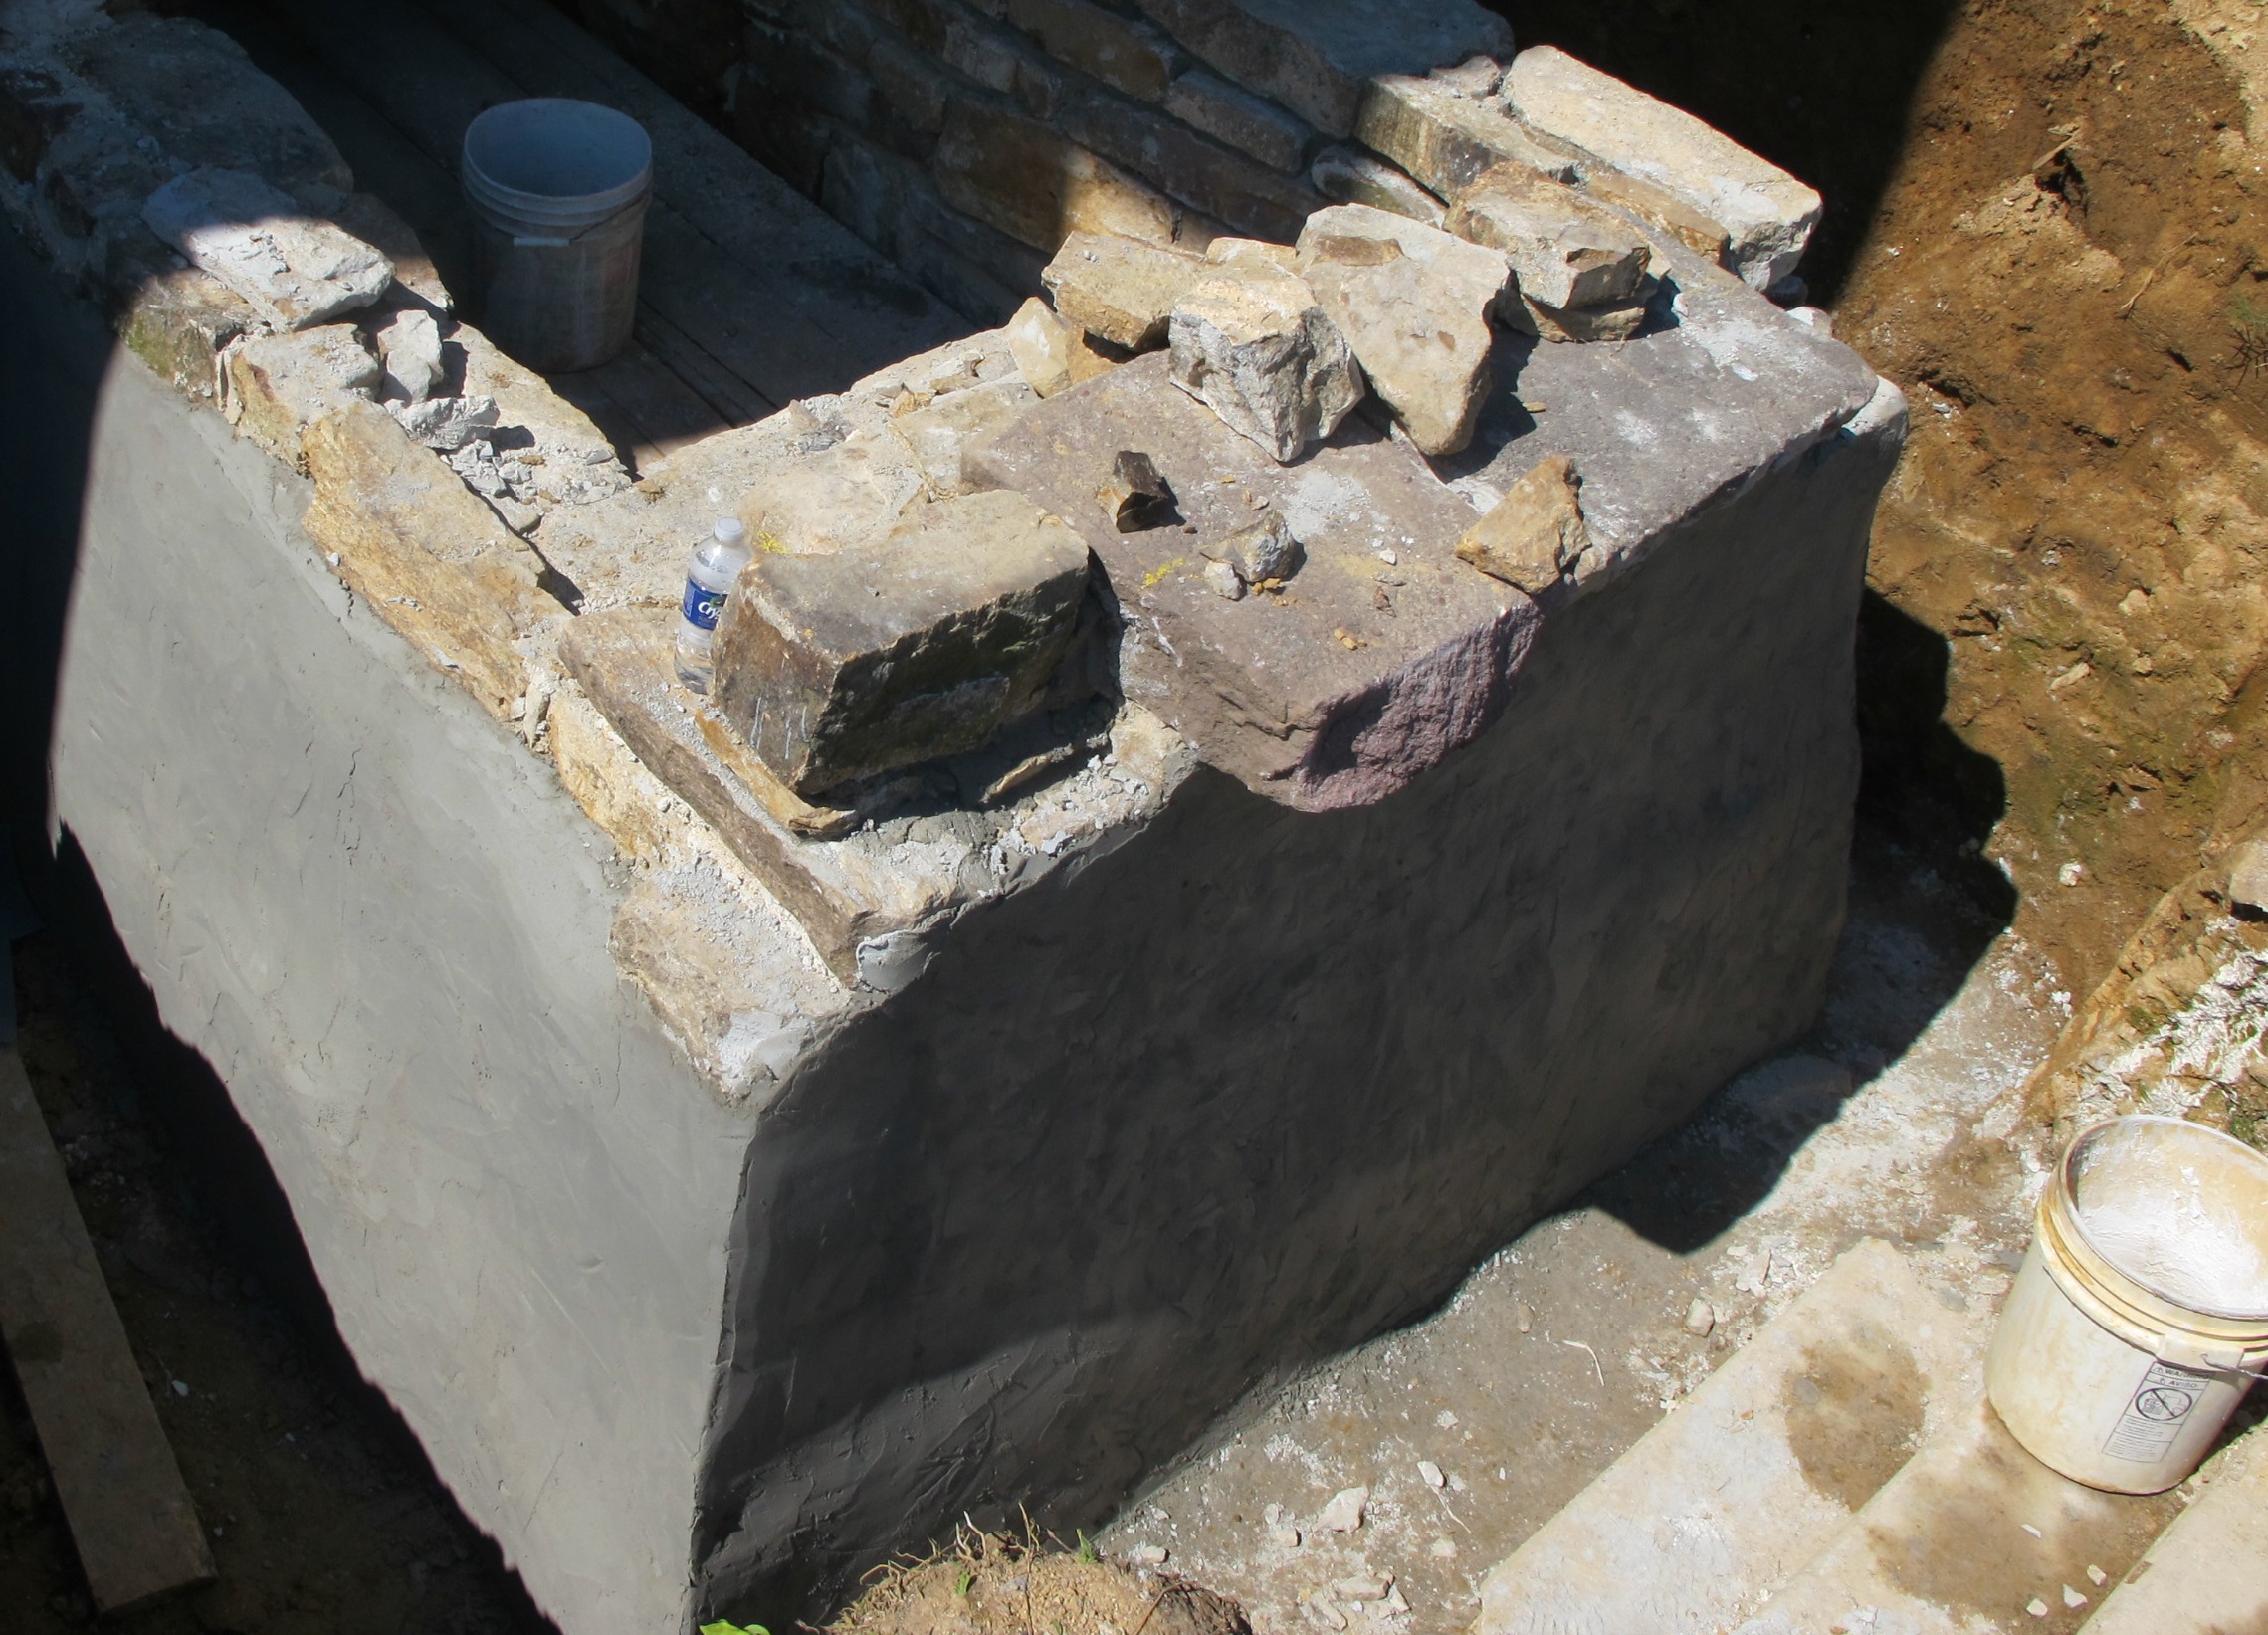
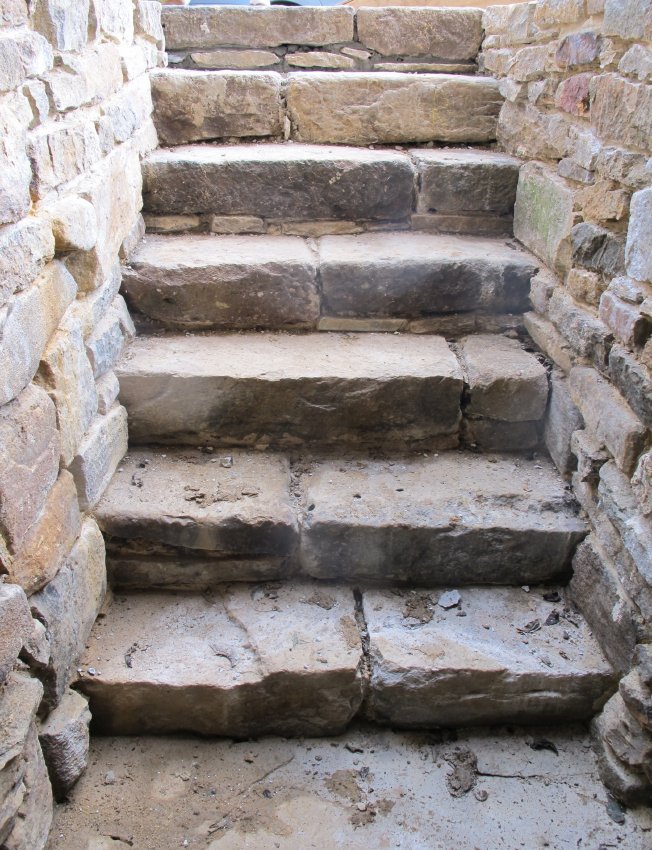
Based on the masonry evidence consisting of coarse stonework of the plinth and the truncated bond-stones projecting from the doorway abutments, the reconstructed retaining walls were leveled with the top of the higher [east] plinth. The restored stone steps were pocketed in mortar beds in the reconstructed walls [Image #56, photo #5249, 8/11/11]. A permeable and relatively non geo-degradable fabric "mesh" was inserted between the projecting plinth-stones and the abutting retaining walls as a clear(c) demarcation between the reconstructed walls and the original masonry foundation "fabric."
(c) i.e., an unambiguous separation, sometimes indicated with a "geo-fabric" or other permeable material, of the original masonry walling from the re-constructed retaining walls.
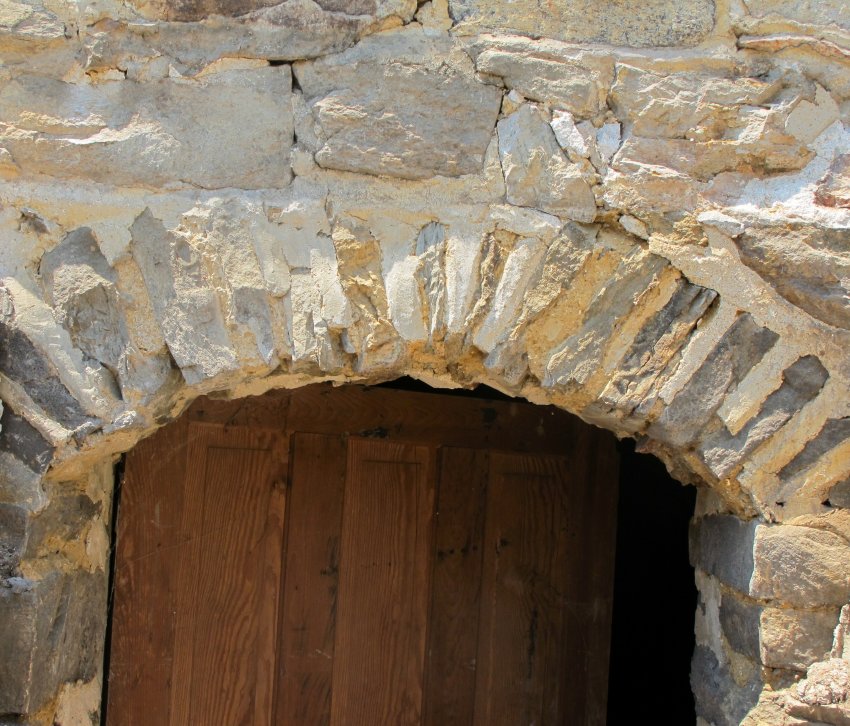
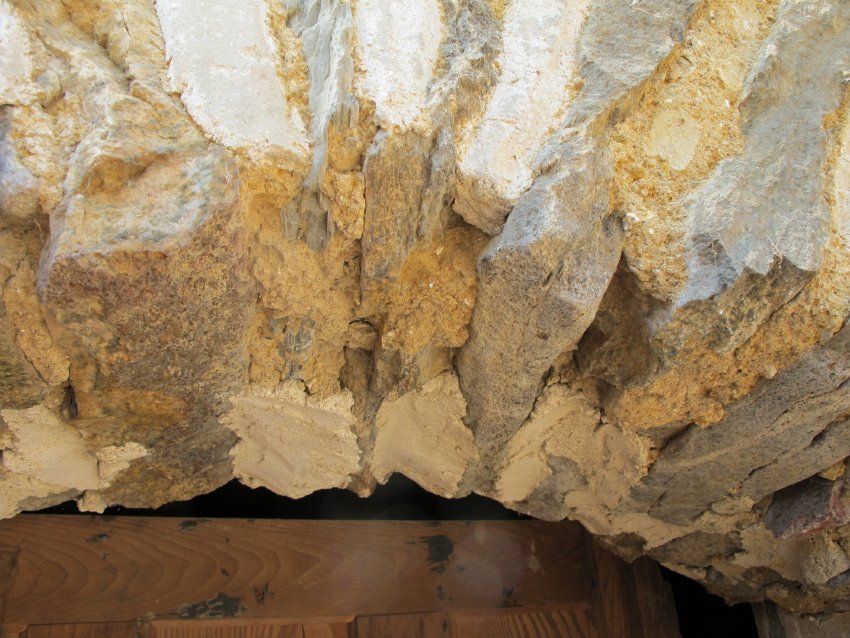
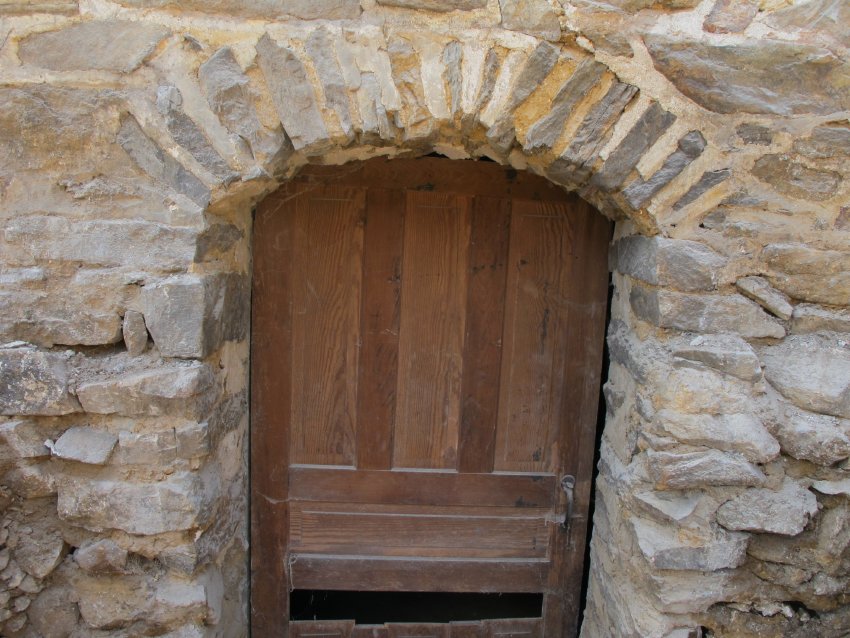
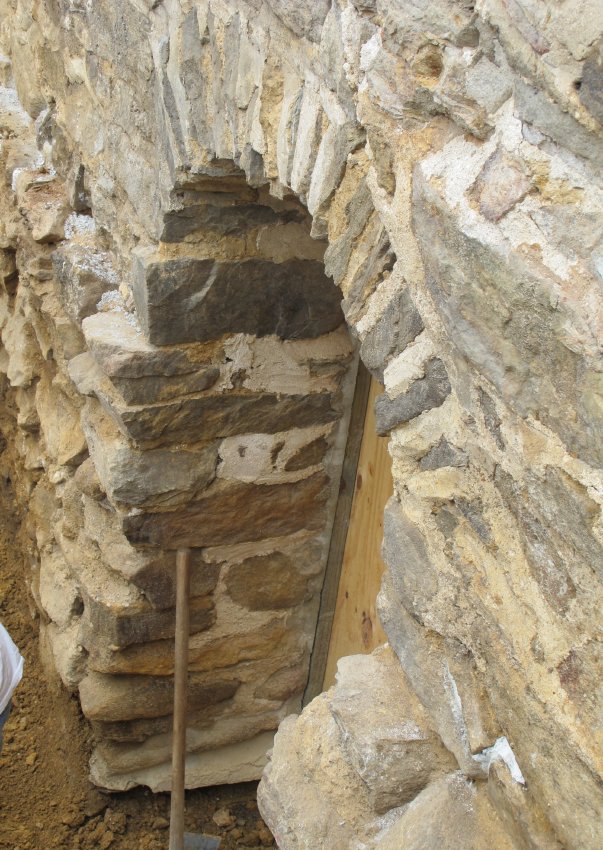
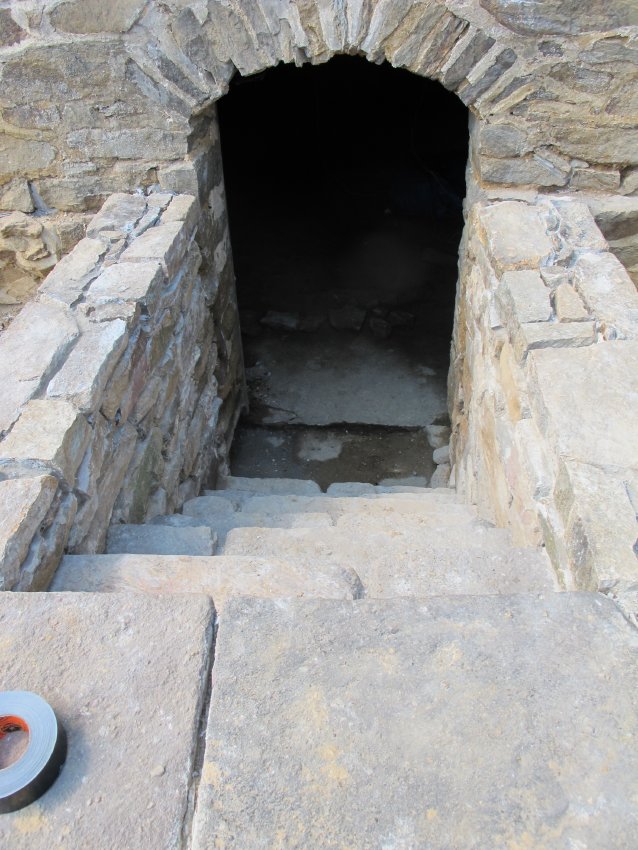
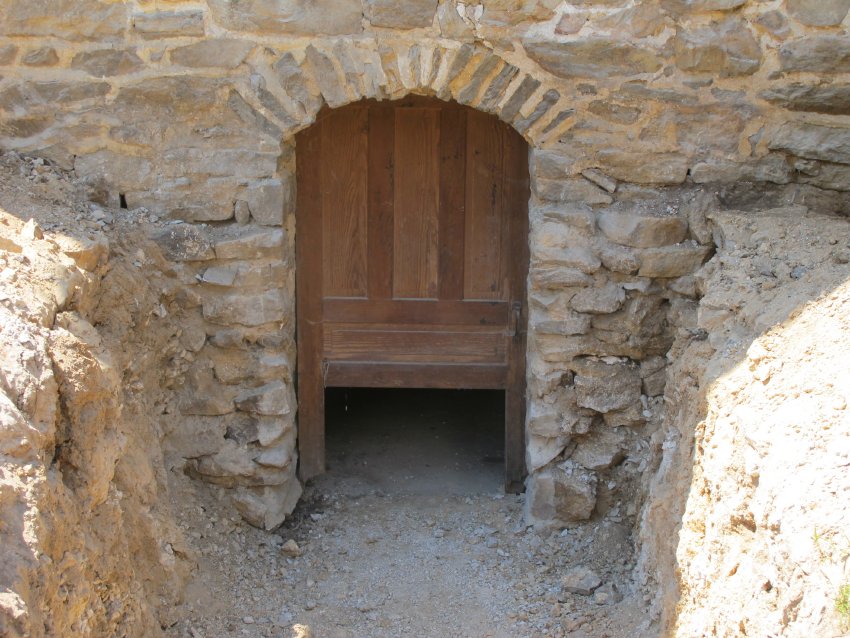
Since the stone arch spanning the cellar entry-way is rather crudely constructed and lacks a wedged keystone, it seems likely that the arch was not intended to be seen except by someone entering through the opening into the cellar. It was built with arch-stones ["voussoirs"] of irregular thickness and length, lacking a common radius, or varying radii, unifying the arch stones in a semi-circular or segmental arc. This was an economy measure eliminating the necessity for chiseling carefully gauged radial curves in each of the stones "springing" from the impost blocks, forming the underside ["intrados" or "soffitt"] of the arch. Although thicker voussoirs would reduce the number of arch-stones necessary to span the opening from 17 to 8 or 10 stone "units," plus a keystone, the greater degree of masoning of larger wedge-shaped stones would have increased the expense and produced a "fancy" arch where a "plain" one would do, since it would be concealed when the cellar doors were closed.
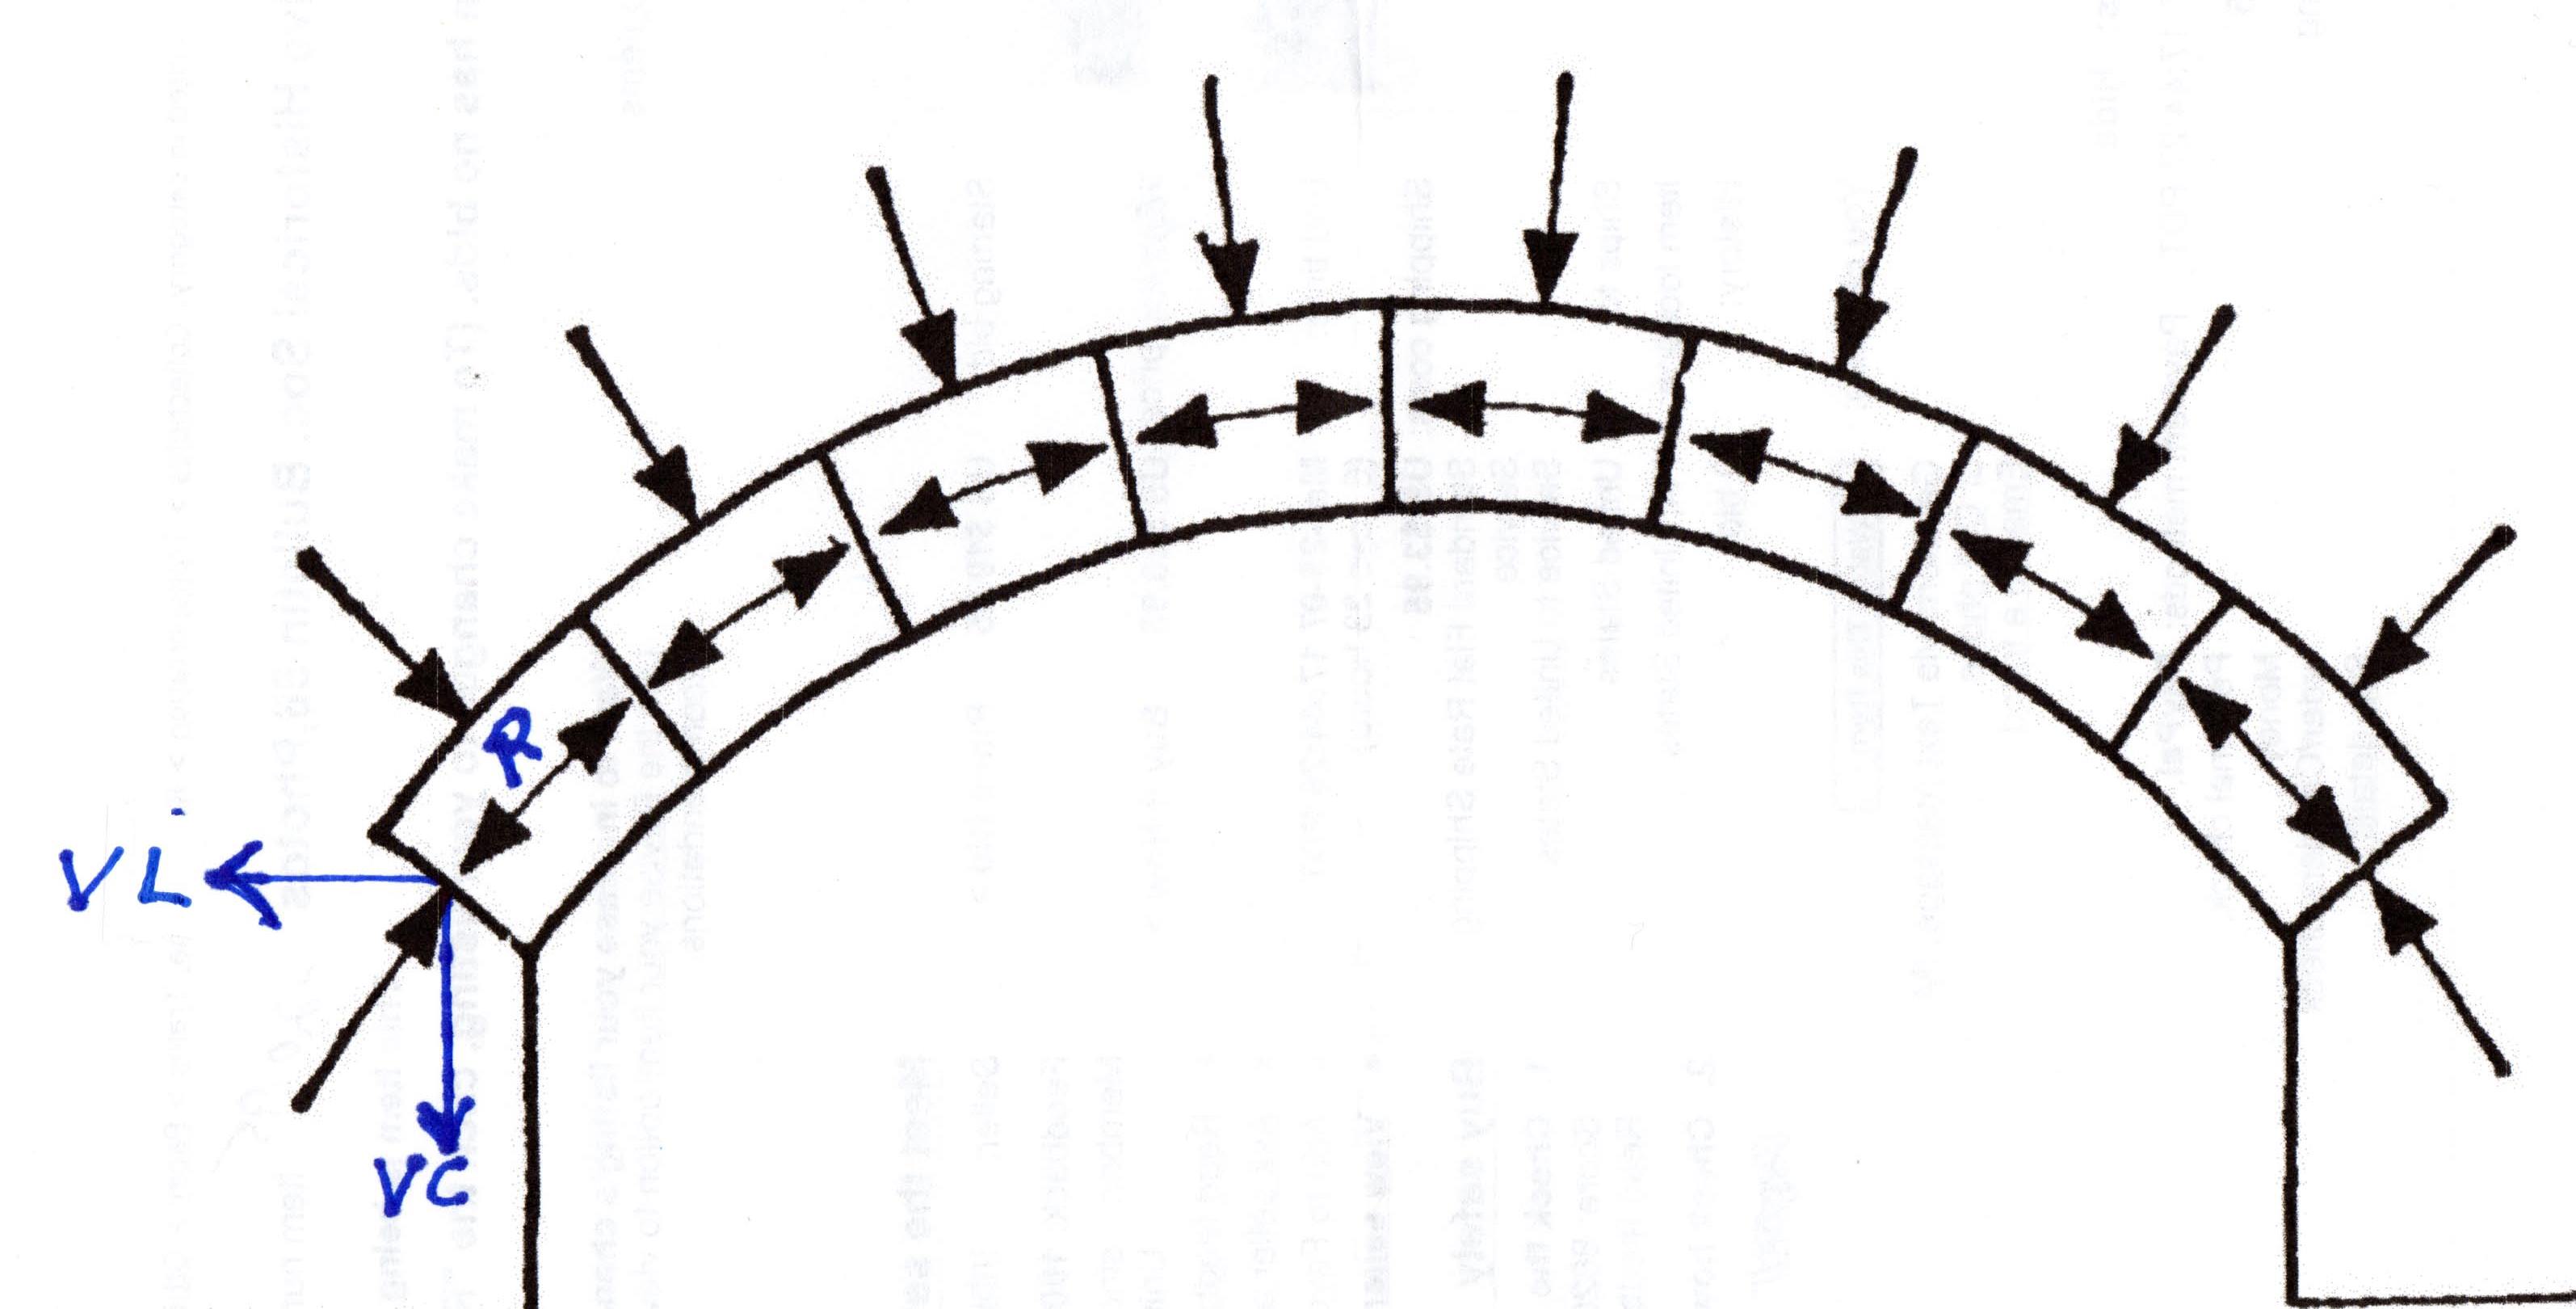
The arcing "soldier-coursed" voussoirs of the cellarway arch are not wedge-shaped, rendering the arch more structurally dependent on the integrity of the joint mortar between them. Wedge-shaped mortar between stones is less reliable than wedge-shaped arch-blocks with thinner mortar joints and a keystone inserted "in compression" at the crest. An arch so constructed would efficiently distribute the incumbent loads through the voussoirs to the imposts on the abutment piers flanking the doorway opening. The oblique ["shearing"], lateral ["L"], and gravitational [vertical] load components, represented by arrows as force "vectors", imposed on the arch are thus neutralized by the masonry mass on each side of the doorway, and ultimately transmitted through springers and imposts down the piers to the bearing plane at the base of the foundation [Image #69, Arch Forces drawing].
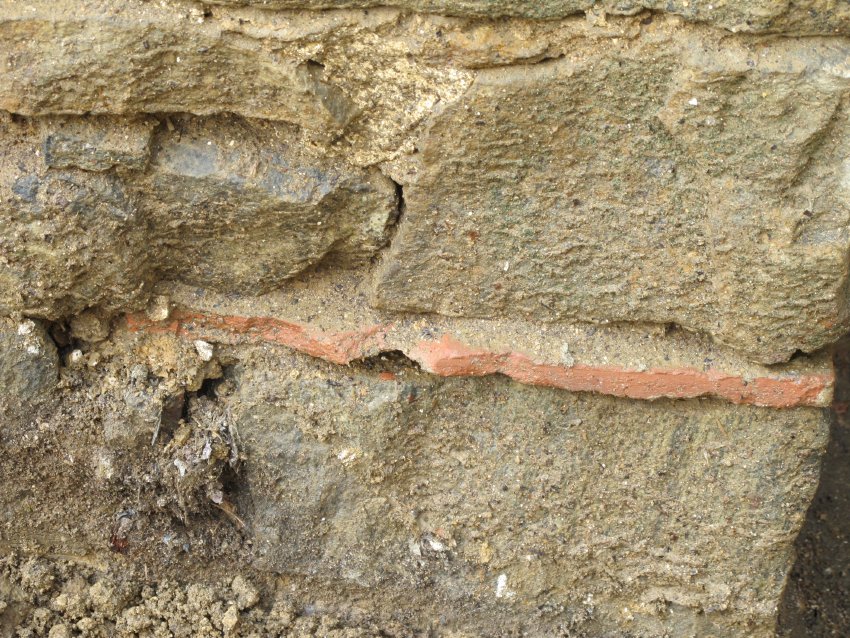
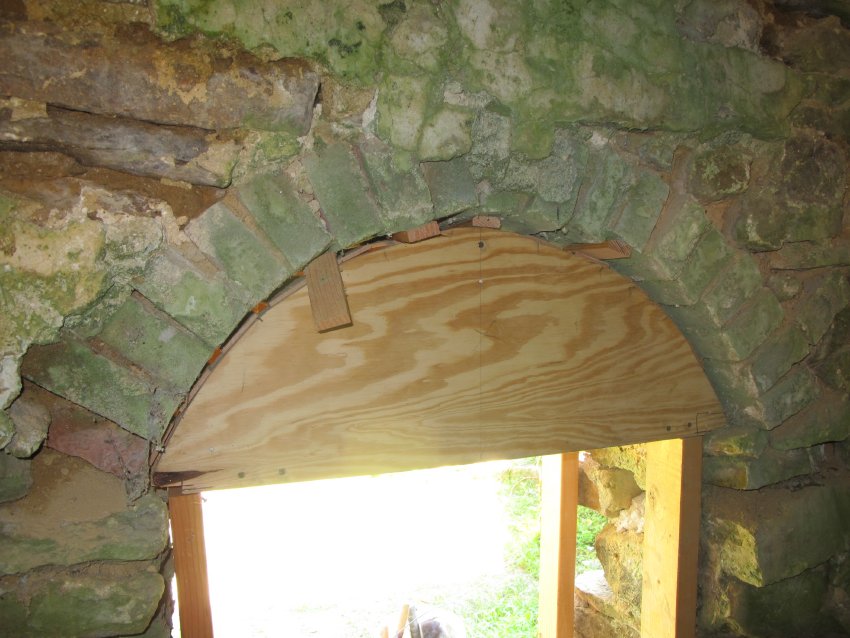
Several different types of mortar from various time periods appear in the cellarway arch, indicating a series of re-pointing campaigns and possibly one or more restructurings of the arch. If the degree of instability from such disturbances was significant enough, a centering frame similar to the one used to repair the doorway to the ground- ["cave-"] cellar in July, 2011 [see Image #70, photo 5332, 8/17/11] would have been essential. "Centers" and other "shores" act during restoration to temporarily perform the force-distribution function of the arch, transferring the loads usually discharged by the arch to the posts or braces supporting the temporary shoring.
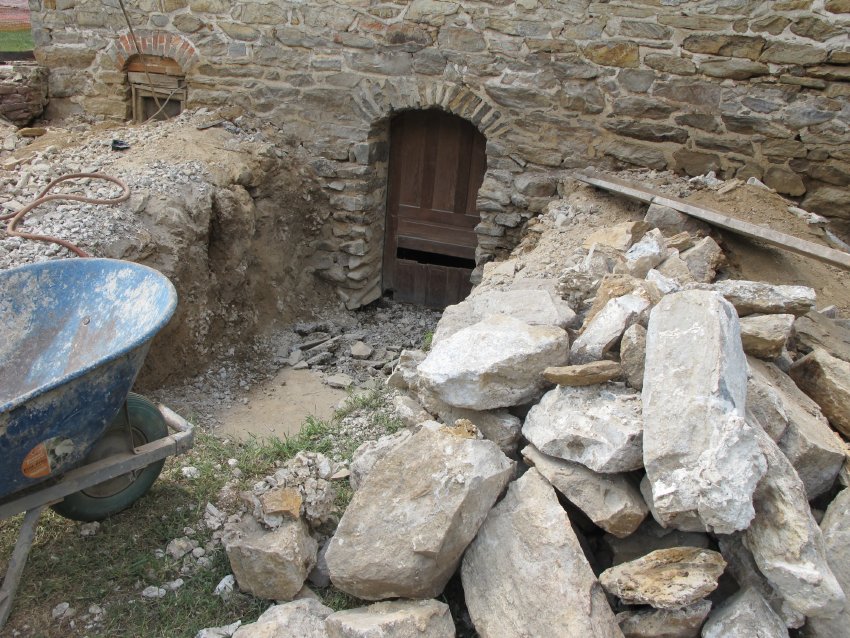
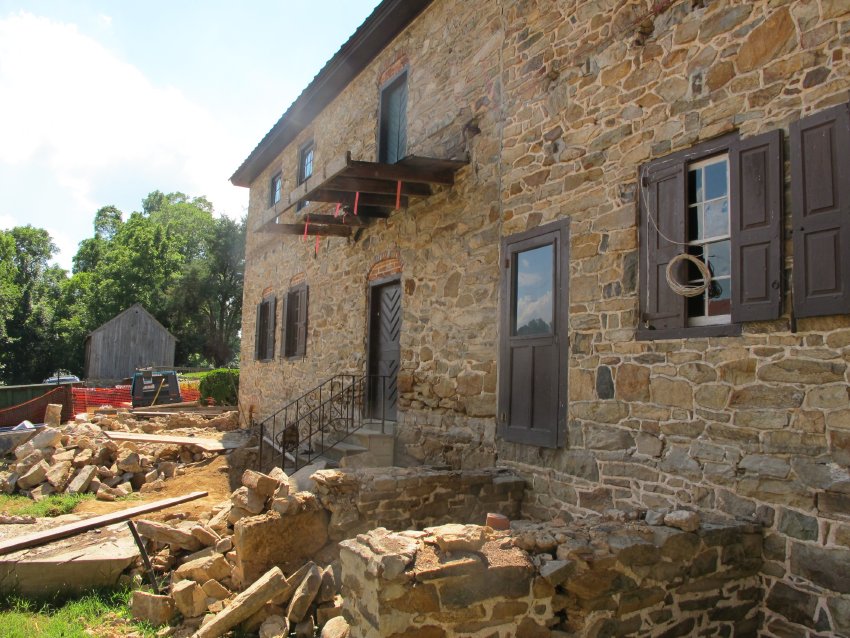
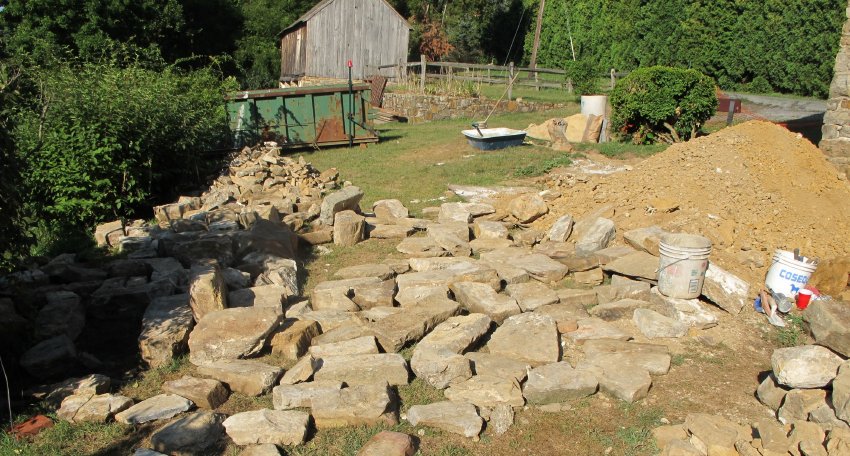
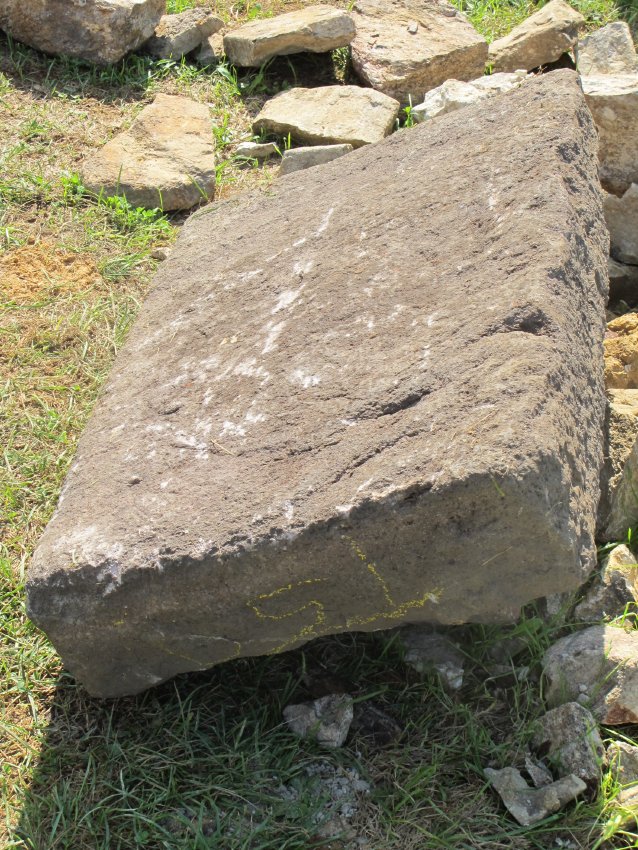
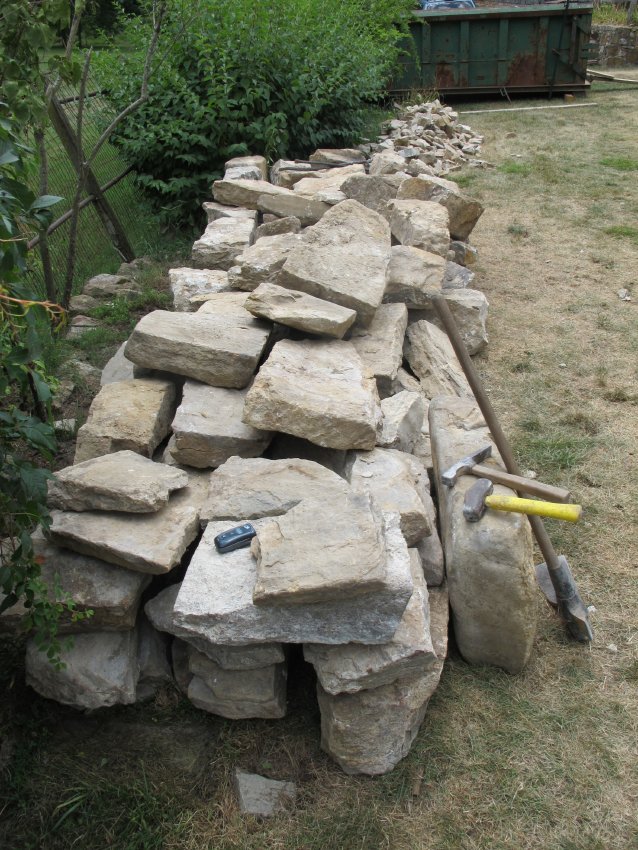
The walls and steps were laid with stones stockpiled from the deconstructed piers supporting the porch deck [Image #71, photo #4572, 7/15/11]. It seems quite possible that these stones have been returned to their original location and function as elements ["units"] of the early retaining walls and steps composing the 1753 cellarway.
It is possible that the cellar entry was an "open-way" with stone steps and retaining walls installed to maintain a solid and passable stairway, but without a vertical or raking door or a "hung-double" pair of doors [Carpenters Company of Philadelphia, page 34, cited below]. However, if structural integration of the early retaining walls and the plinth masonry flanking the doorway was part of the original construction of the house, it seems reasonable to infer that the top surfaces of the stone side-walls were aligned on a level horizontal plane and supported some form of sheltering structure [a "bulkhead" in 19th-century terminology, or "cellar cap" in 18th-century usage (see end-note {4}] covering the steps and passage through the cellar wall.
This raises two questions: (1) whether wooden "bulkhead" cellar entries appeared in 18th-century Pennsylvania domestic buildings and (2) whether there are is any evidence of such a structure at the 1753 Jacob Keim house.
The 1786 "Rule Book" [pricing guide] of the Carpenters' Company of Philadelphia specifies at page 34 (of the 1971 Pyne Press edition edited by Charles E. Peterson): "Cellar doors ledg'd{1} about four feet wide, of pine boards, sap'd{2}, and hung double, the cheeks{3} and sills of pine scantling [dimensioned lumber]…[price stated]
Ditto, with red cedar cheeks and sills…[priced]
And when hewed out of red cedar posts…[priced]."
The "Rules" text relating to "cellar doors" continues with other refinements and details, including "posts to support [cellar] doors when open'd," a clear indication that "cellar doors" were raked and supported on an angled "bulkhead"{4} structure, presumably of wood, and almost certainly of the same triangular geometry as the shed-form ["flat-topped"] dormer cited in footnote {3} below and illustrated on Plate VIII of the Rules.
Above the foundation plinth level there is a more plumb (though only roughly dressed) wall plane, and no evidence that any early masonry retaining wall had been bonded or butt-joined to the upper walling above the base of the arch imposts. This suggests that there were no raking stone "cheek' walls to support angled cellar doors, which reinforces the premise that the cheeks were wooden as specified in the Carpenters Company Rules.
The earliest published reference in Pennsylvania to raking masonry "cheeks" (also referring to and pricing sills and cheeks of wood) appears to be the following excerpt from The Practical House Carpenter's Directory published in West Chester, Chester County, PA in 1797:
"Cellar doors with stone sills and cheeks…[priced],
Ditto, of sawed scantling…[priced],
Ditto, of hewed…"
"Note, cellar doors are supposed to be double hung"(d).
(d) i.e, two doors on 'hooks and hinges' the usage of 'hook' was almost universal in 18th-century construction documents, building accounts, and architectural publications in the mid-Atlantic colonies, long before "pintle," an old English word with varying meanings, became the common term for the pin or shaft on which builders' hinges pivot
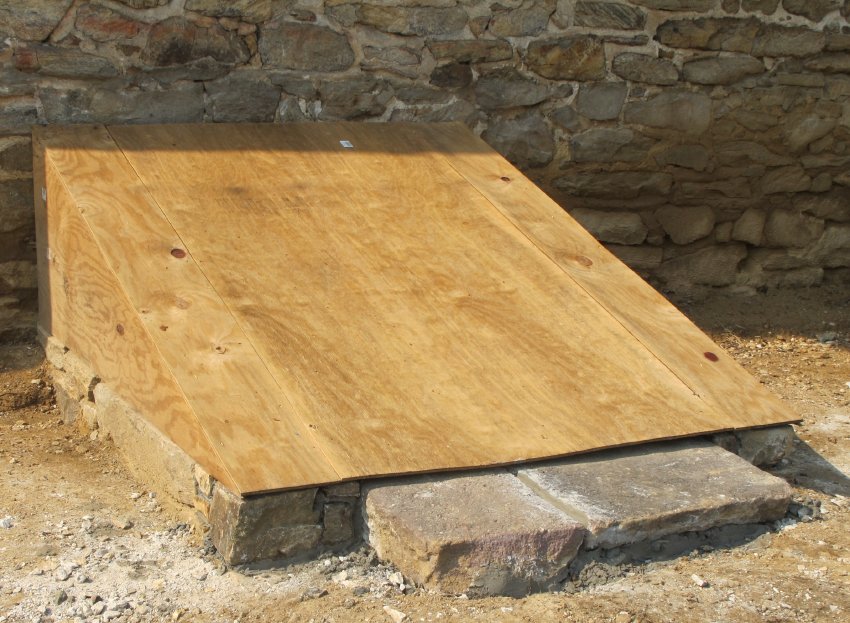
Although the Keim house was constructed a generation before the Carpenters' Company "Rules" were promulgated, the Rules provide documentation of the presence of wooden cheeks supporting angled cellar doors in 18th-century Pennsylvania house construction. The published record and the masonry evidence would seem to afford a sound basis for a framed wooden "cellar cap" for the Keim cellar "bulkhead," consisting of board "cheeks" set on the leveled cellarway walls and providing access through a pair of "ledg'd" doors set at an angle to meet the building wall just above the stone-arch crest. Based on the opening into the cellar and the probable thickness of the support/retaining walls, the Keim "cellar cap" [see definition in note {4} below] would, by coincidence and rational dimensioning, span four feet across, as specified in the Phildadelphia "Rules".
The reconstructed Keim cellar entry structure will include support posts, as specified as an option in the Rules, for the six-foot-long "hung-double" doors.
DETAILED CAPTIONS
Image #1, 4421: 20th-century concrete retaining walls extending fifteen feet from the south foundation plinth, including the raking segments flanking the concrete steps descending under the porch
#2, photo 4437, 7/10/11: Western retaining wall, about three feet thick from the doorway jamb along the foundation plinth
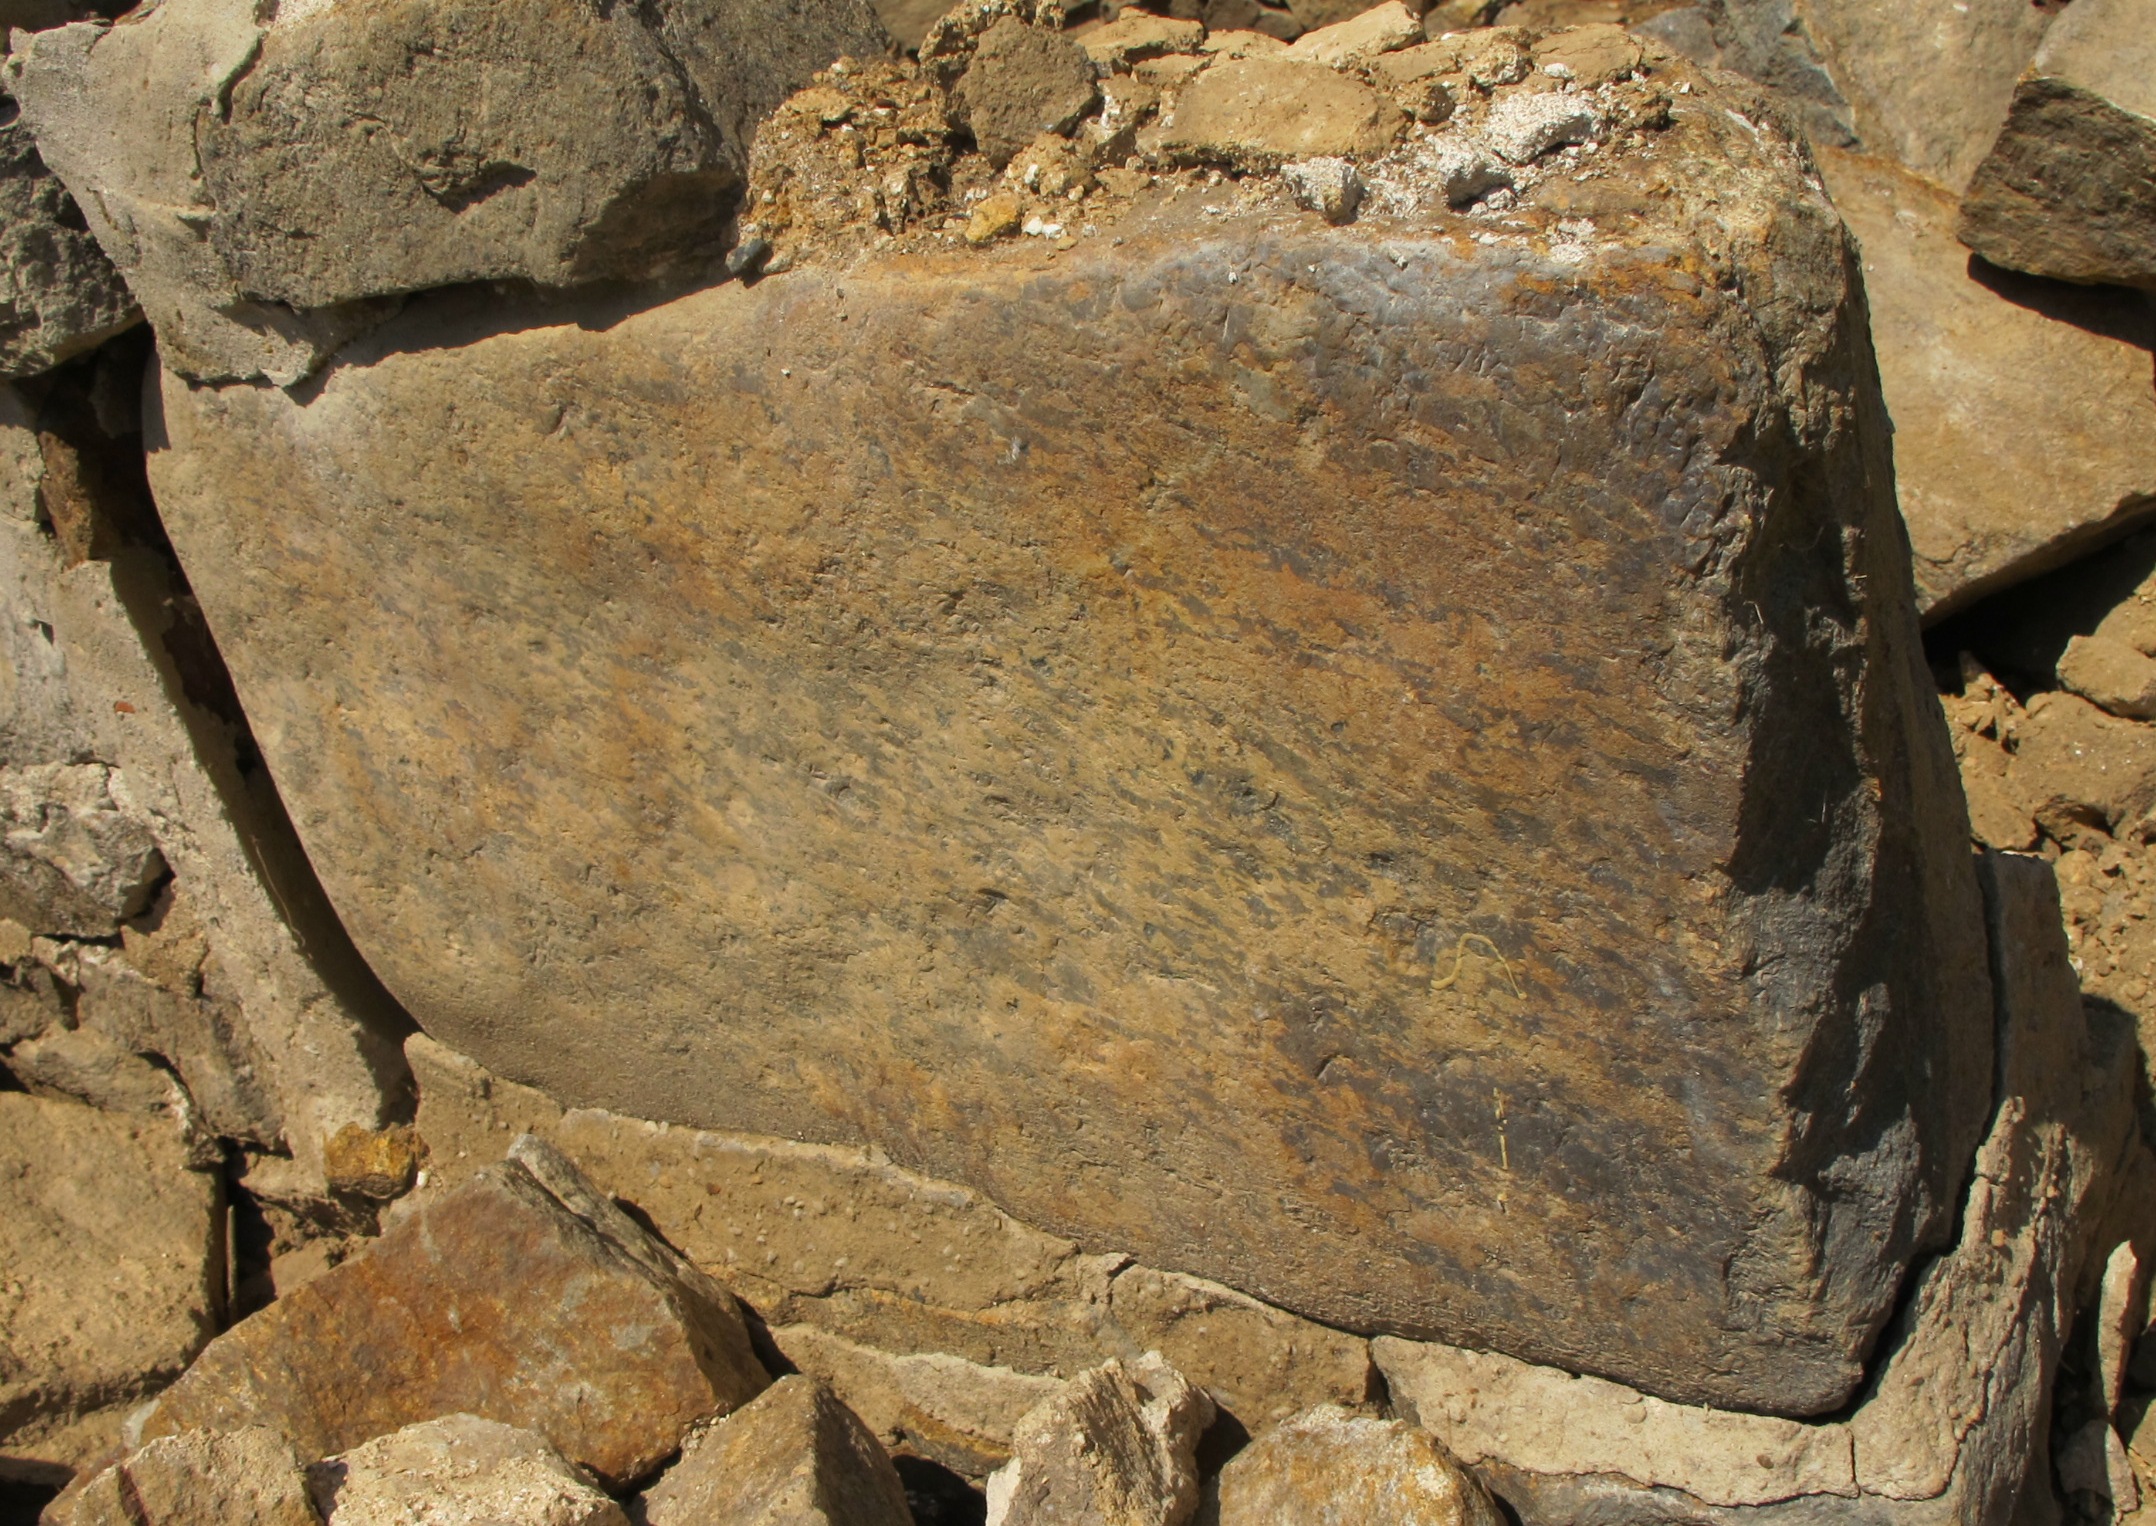
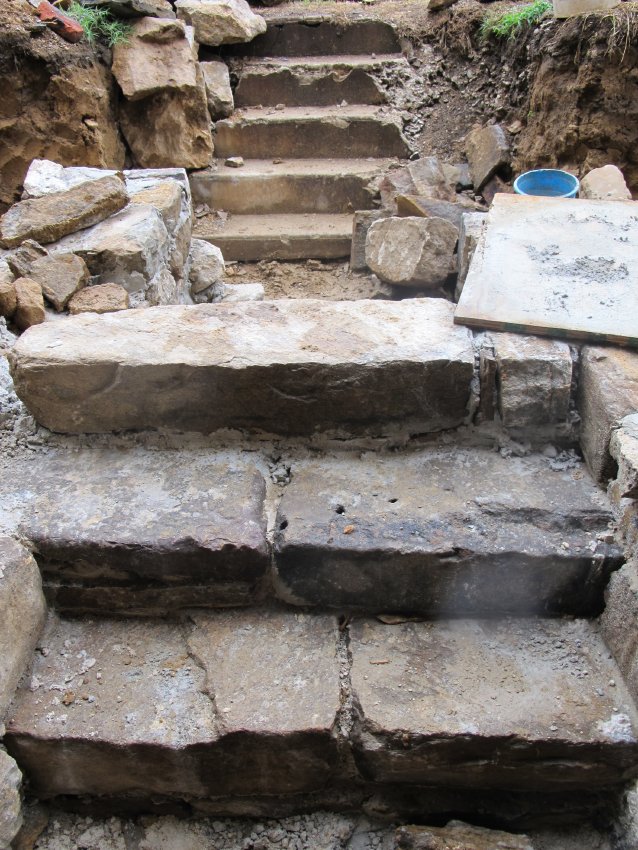
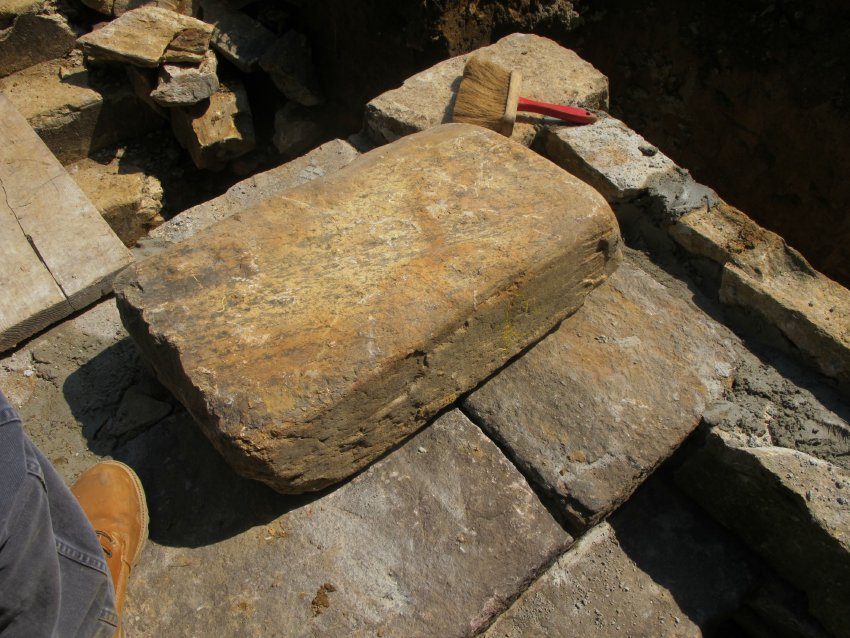
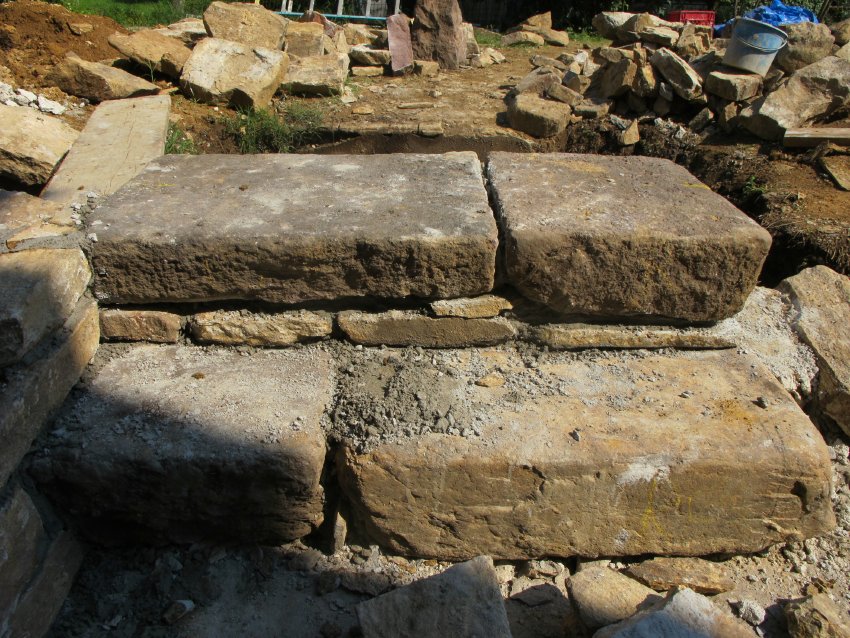
#3, photo 4442, 7/10/11: Large stone from porch support piers, possibly recycled from a fireplace hearth, based on the reddish heat-burn and black scorch-marks; now placed as half of the step [tread and riser formed by a single block] at the sixth level of the cellar stairs
#4, photo 4463, 7/10/11: seventeen narrow stone "voussoirs" forming the cellar-way arch
#5, photo 4472, 7/10/11: three different mortars in arch intrados ["soffit or underside of lowest course of arch]; the darker brown mortar appears to the earliest; however, each will be analyzed for content to help determine sequence.
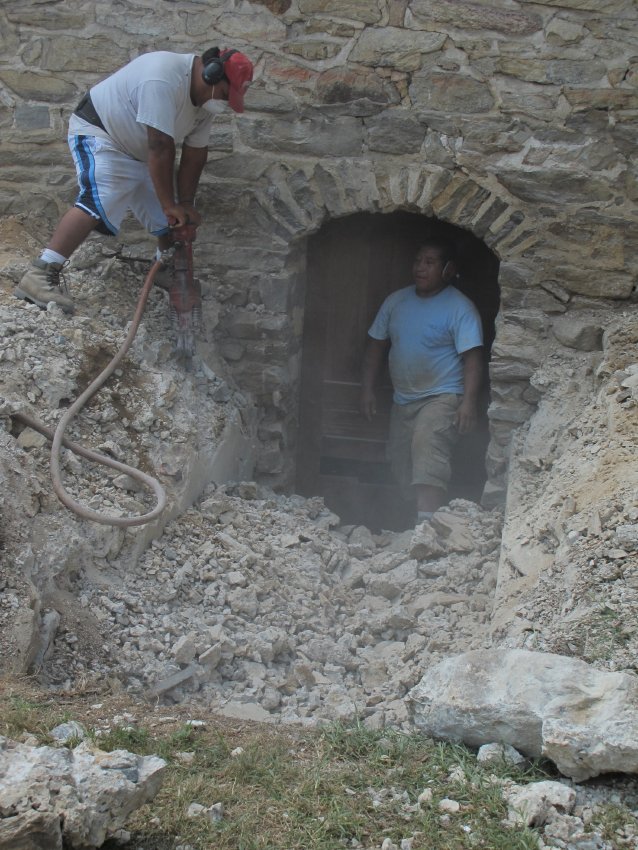
##6 & 7, photos 4496 & 4505, 7/12/11: jack-hammering and removing concrete rubble from retaining walls
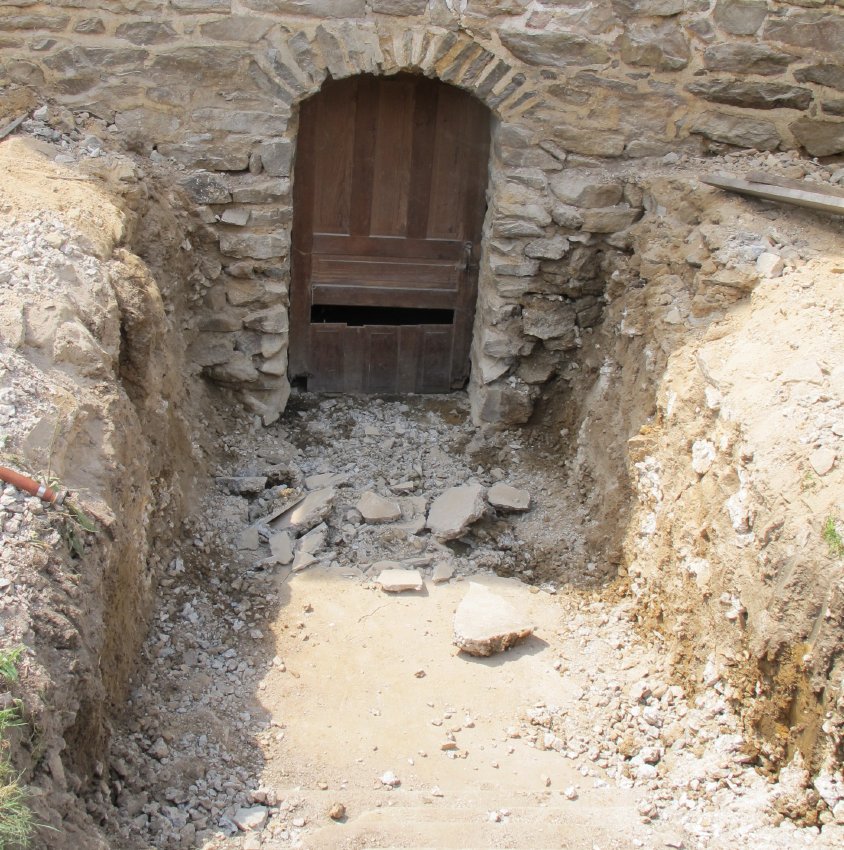
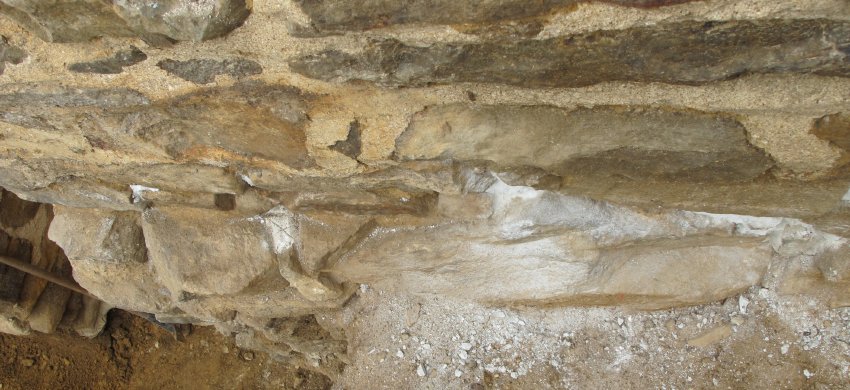
#8, photo 4507, 7/13/11: 20th century concrete retaining walls have been removed; bond stones projecting from foundation are visible, including those cut to align with the concrete walls at their joint
#9, photo 4514, 7/12/11: detail, west abutment of cellar doorway
#10, photo 4518, 7/12/11: detail view of voussoirs, springers, imposts, and foundation plinth of arched cellar-doorway
#11, photo 4571, 7/15/11: Rubble from concrete retaining walls has been removed to accommodate re-construction of stone walls on clay bed.
#12, photo 4506, 7/13/11: stones removed from porch piers; rubble stone foundation plinth; grade disparity will be contoured to conduct ground water and roof runoff away from buildings.
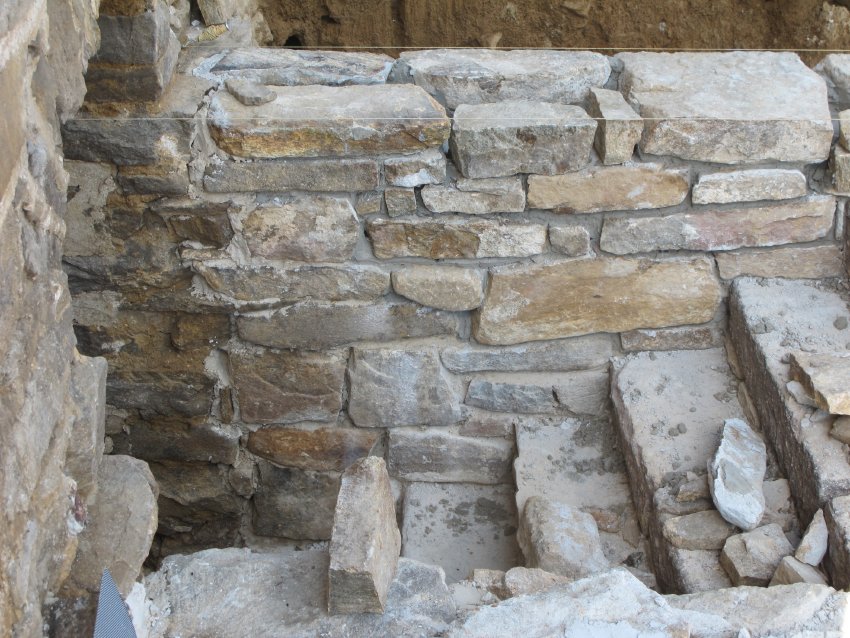
#13, photo 4515, 7/13/11: detail of abutment pier of cellar door opening showing projecting ["toothed"] stones which were bonded with the early retaining wall on the western flank of the cellar-way.
#14, photo 4522, 7/13/11: detail of lower segment of west abutment, showing mortar defining top of stone sill [to be replaced]
#15, photo 4531, 7/13/11: two [of six] stone piers which supported 20th century porch and butted against 18th century foundation and cellar walls above plinths; stones will be re-purposed for use in restored cellarway steps.
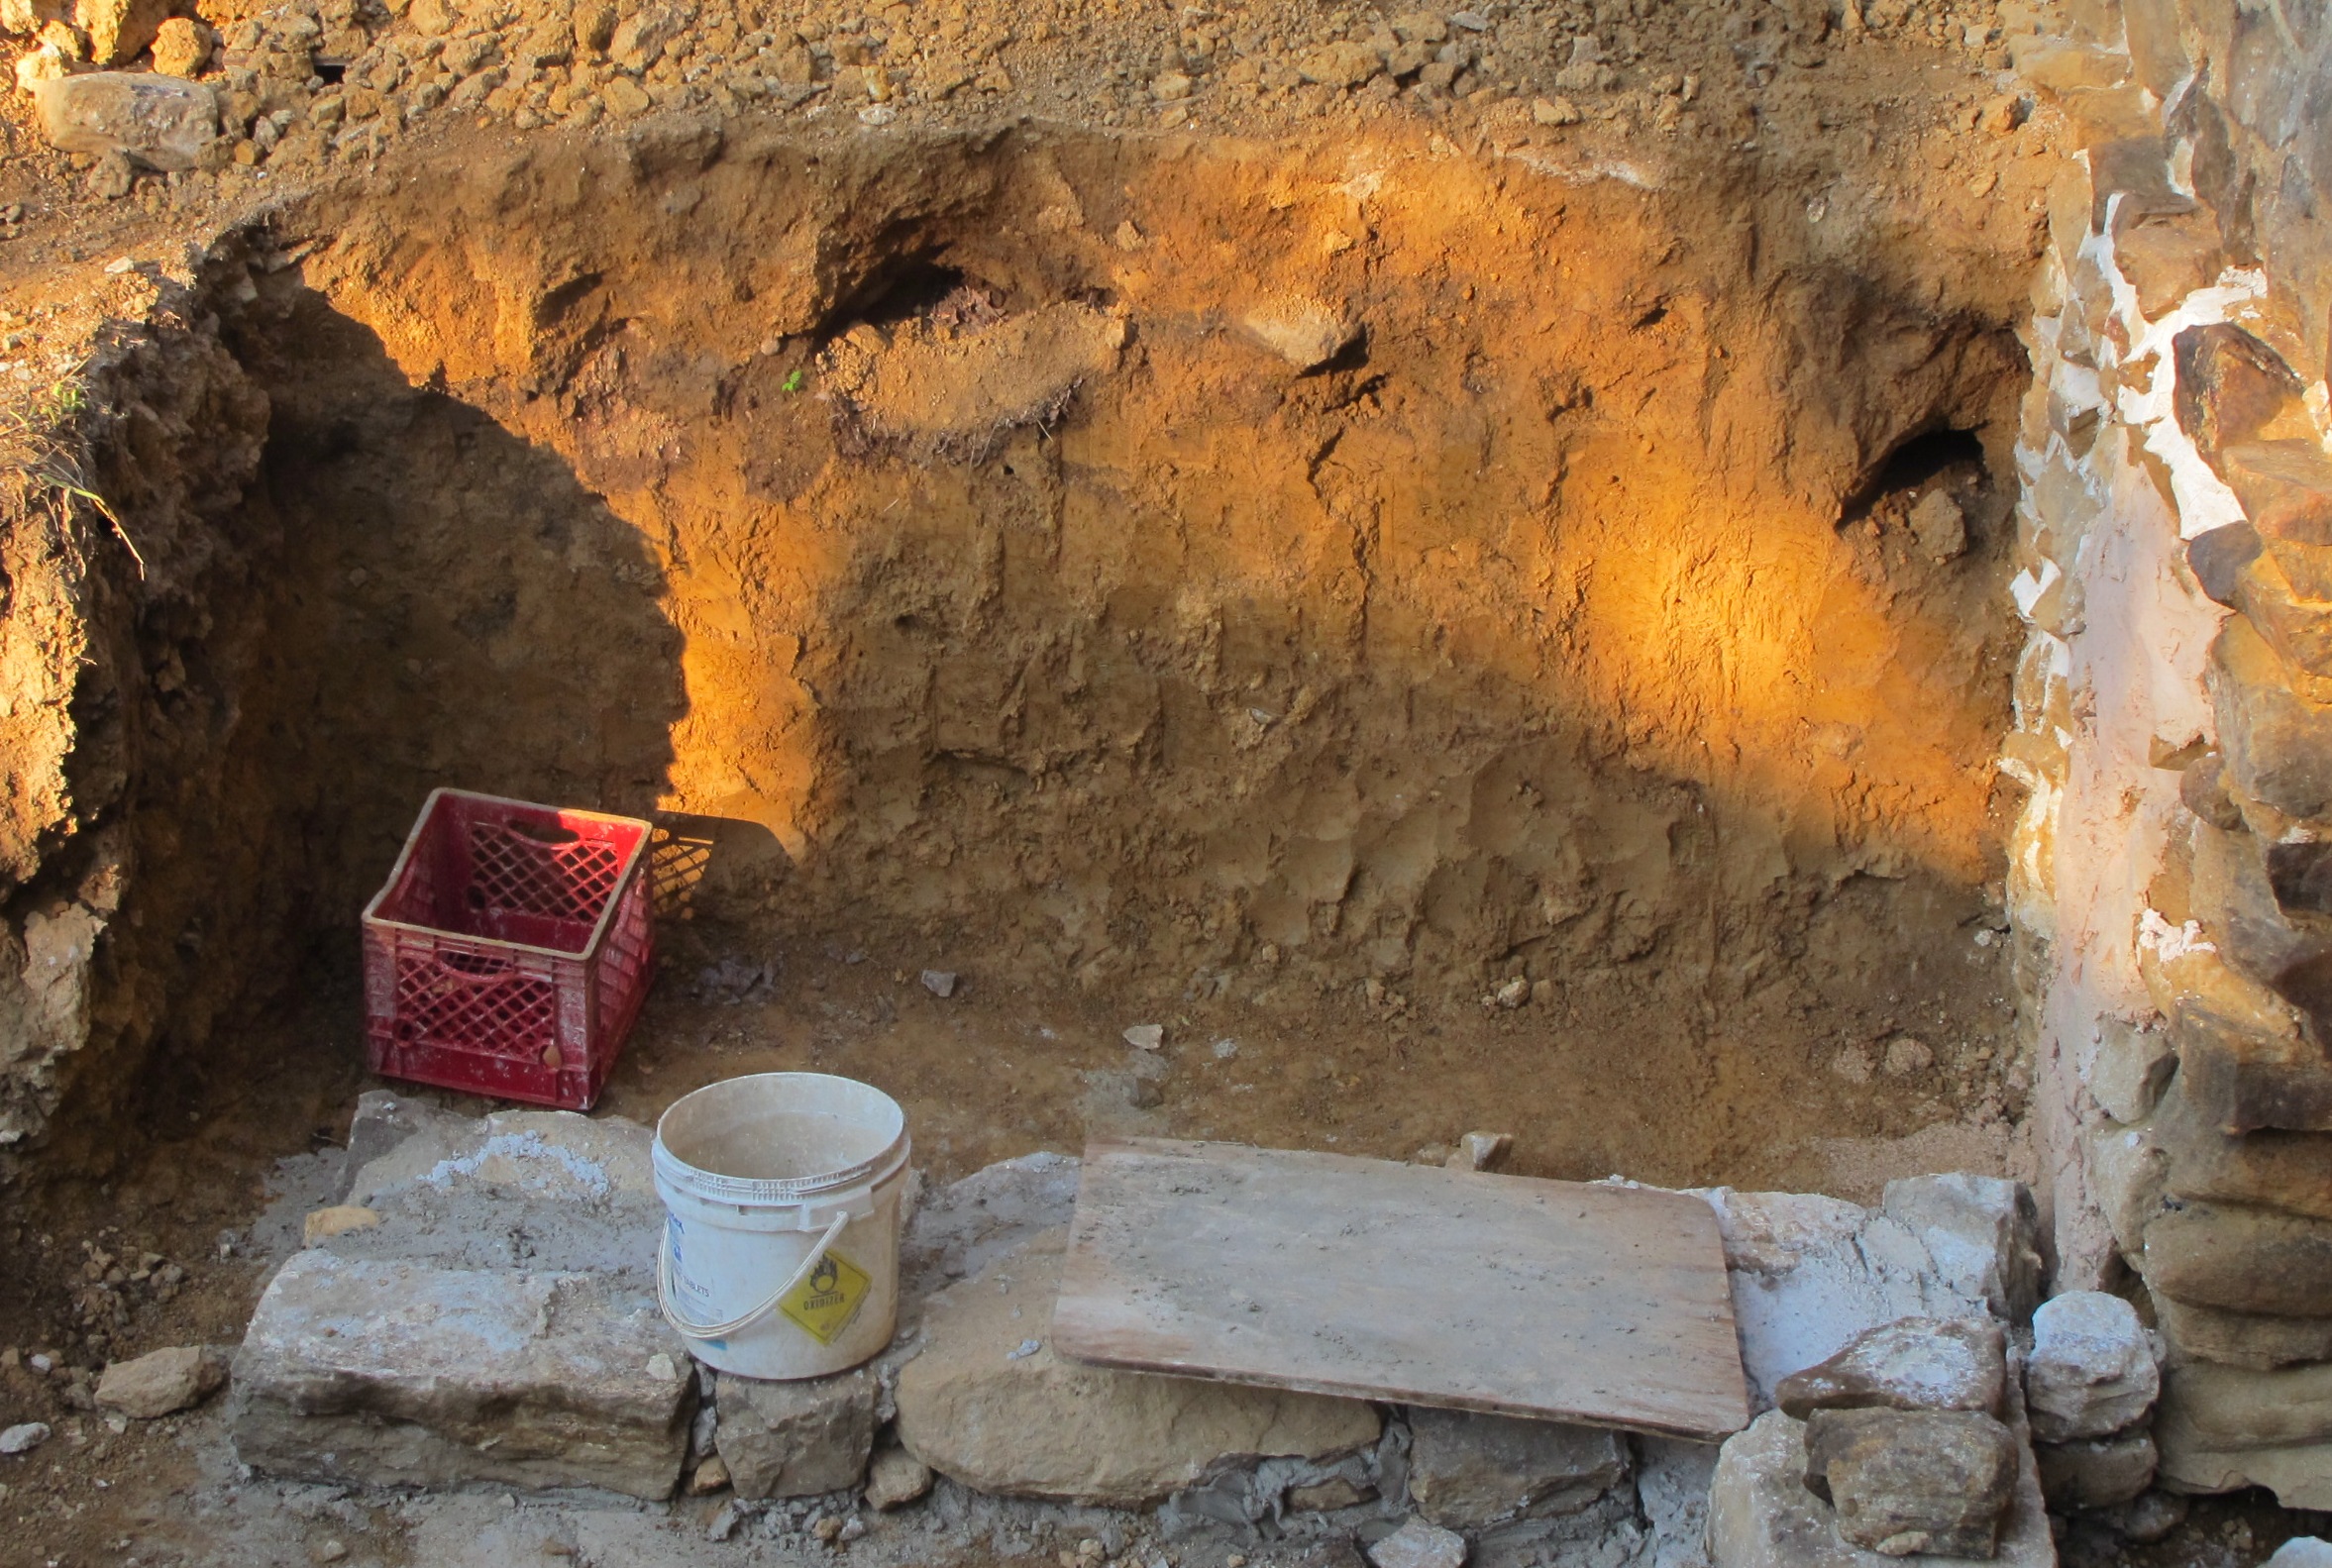
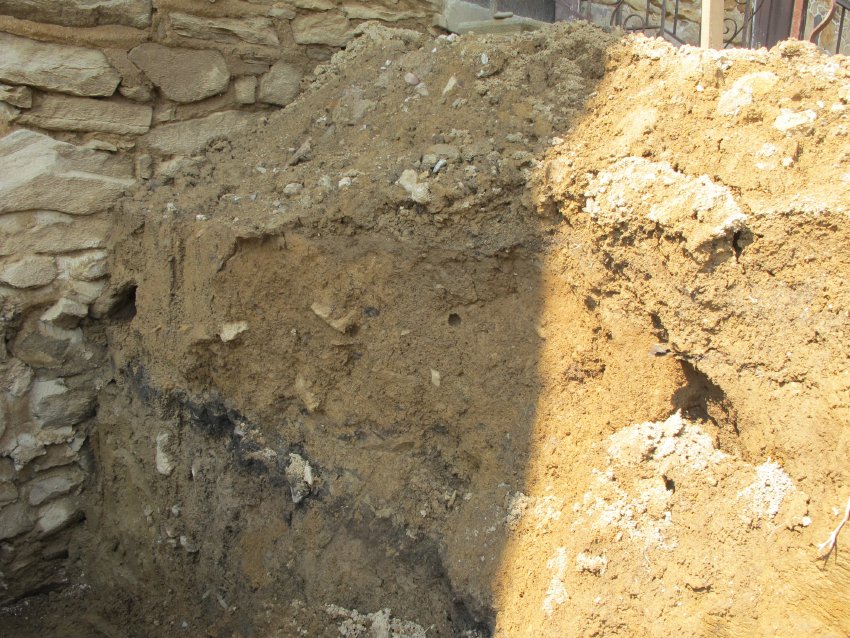
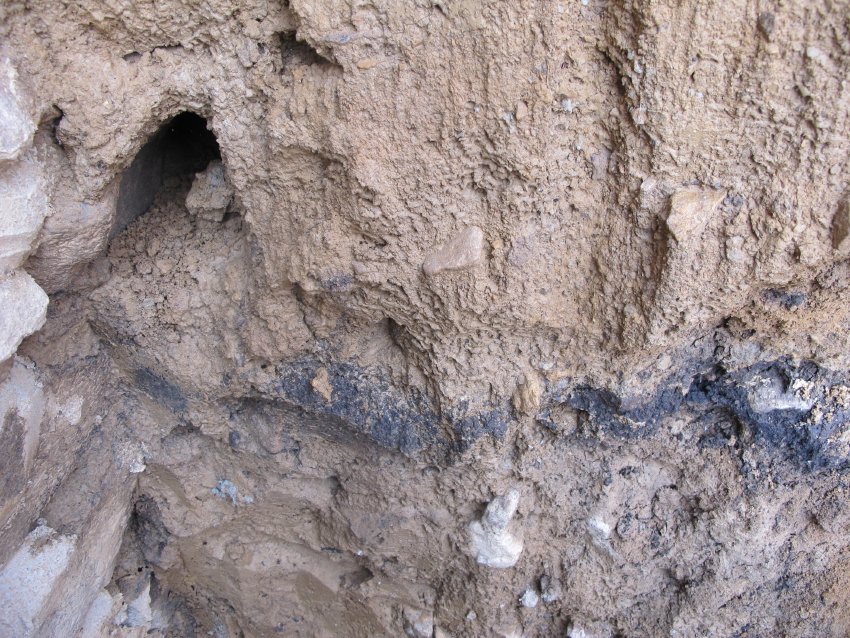
#16, 4879, 7/28/11: view of arch and top of rubble stone plinth projecting from cellar walls; the supposition is that the un-planed plinth walling was concealed below the early grade; however, excavation has revealed a layer of soil, approximately 18 inches below grade [#17, photo 4942, 8/2/11, #18, photo 5158 & #19, photo 5161, 8/8/11], which is darker than the amber-yellow clay bed material [apparently undisturbed prior to the present project] and was probably the topsoil layer prior to construction and occupancy of the house. Further archaeological analysis will be undertaken to examine the over-filled "topsoil" and the clay-based soils above and below it.
#20, photo 4881, 7/28/11: detail of eastern plinth.
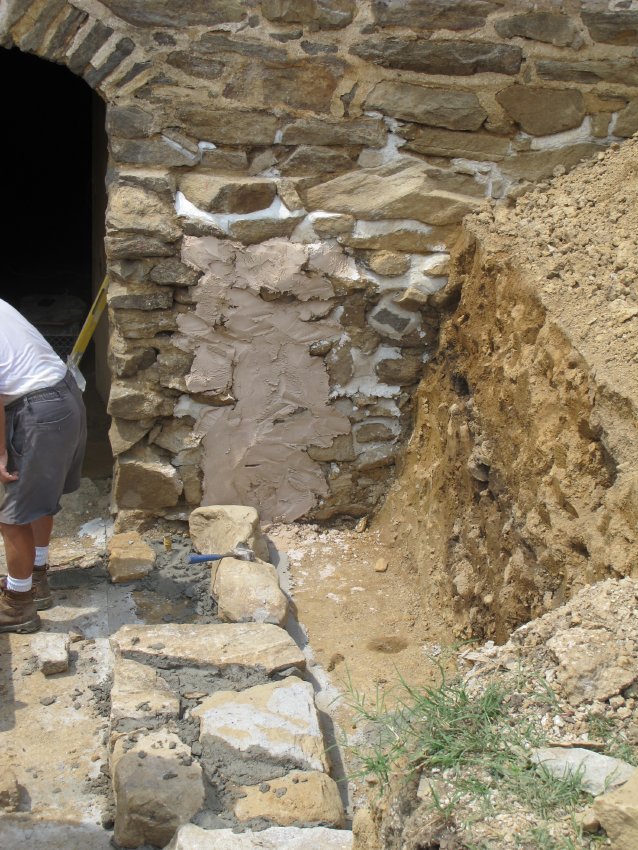
#21, photo 4884, 7/31/11: excavated "well" for re-constructed retaining walls; the exposed foundation joints, which had lost much of their mortar integrity, have been "flush pointed" with lime mortar to establish a joint-plane with the restored retaining walls.
#22, photo 4932, flush-pointed [east], and #24, photo 4933 [west] abutments of cellar doorway;
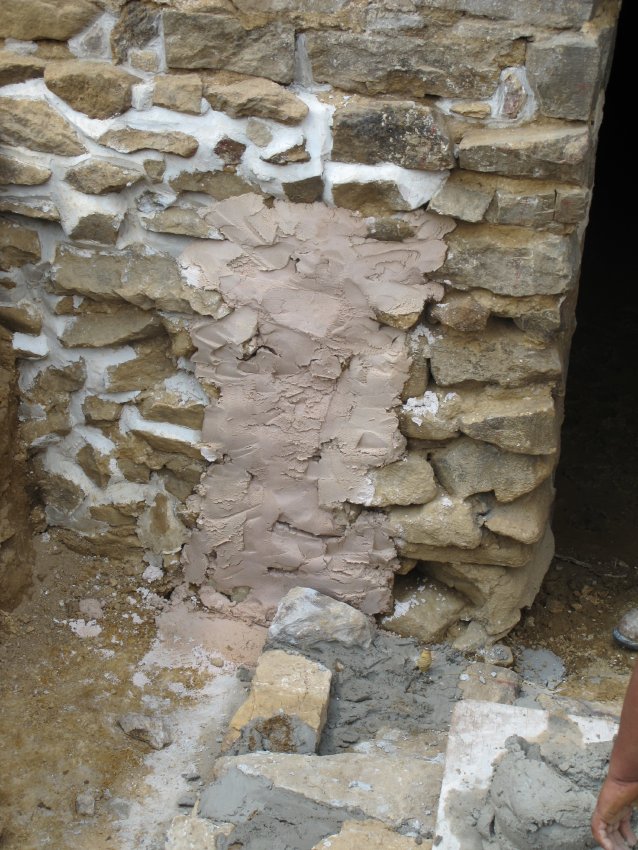
#23, 4939 8/1/11 [east], and #25, photo 4935 [west] base blocks of retaining walls set on tamped and leveled bearing-clay bed; abutment pier has been pargeted [except for inner wythe of doorway jamb] which will be bonded to the new walls.
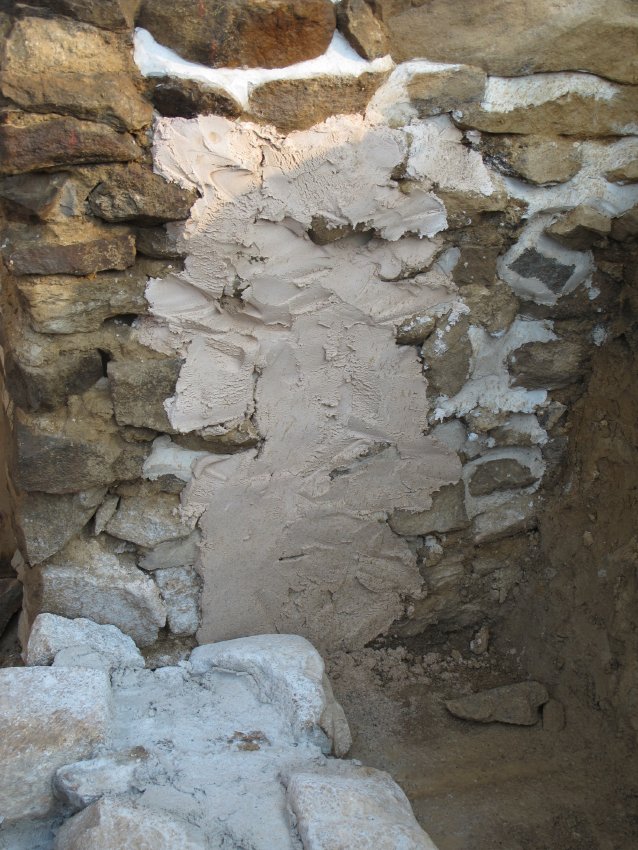
#26, photo 4947, 8/2/11: The pargeting mortar and the joint mortar between the original foundation plinth consist of tinted lime mortar [no Portland cement] to define the joint and ensure reversibility of the installation.
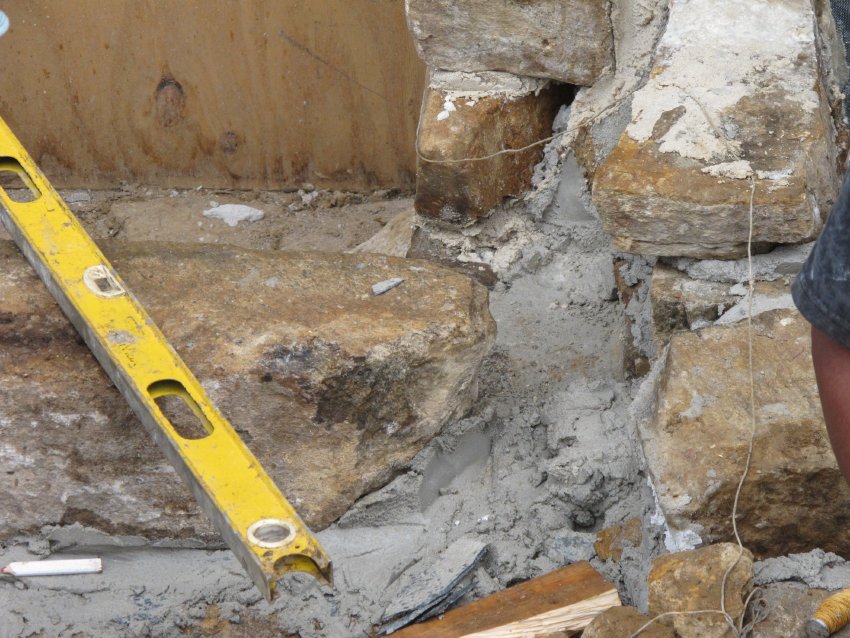
#27, photo 4952, 8/2/11: A permeable, minimally geo-degradable fabric ["mesh"] and the new joint mortar will delineate the early masonry from the re-constructed retaining wall.
#28, photo 4949, 8/2/11: stones re-cycled from porch piers (probably original stones from the tread & riser stones and retaining and bearing walls for the early cellar-door structure) laid out in yard for selection as base-blocks or footing stones to be set on the clay bearing plane; bed-stones in core of wall; or roughly dressed face-stones for inner or outer wythes of the cellarway walls.
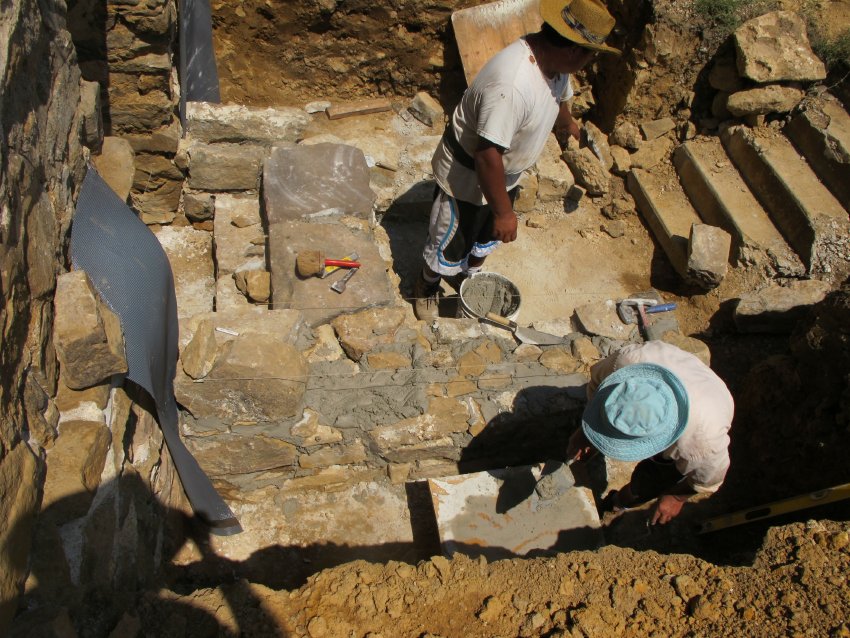
#29, photo 4981, 8/2/11: setting large face-stone at level T2 [each tread consists of two stones, T2A and T2B, e.g., which have a 10-inch exposed "tread" width between risers, which average 8 inches high].
#30, photo 4976, 8/2/11: 20th-century concrete steps [upper right in photo] which descended under porch to concrete pavement leading to cellar doorway
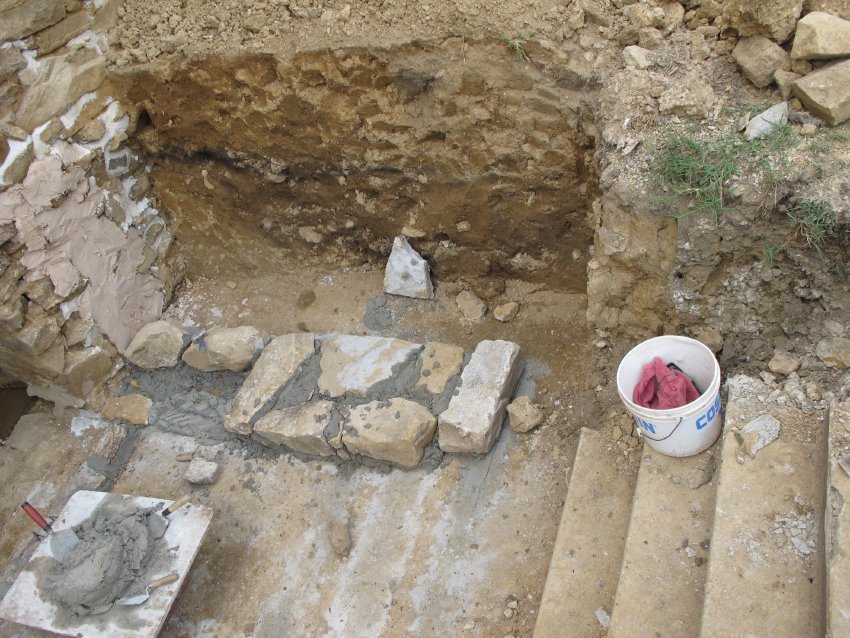
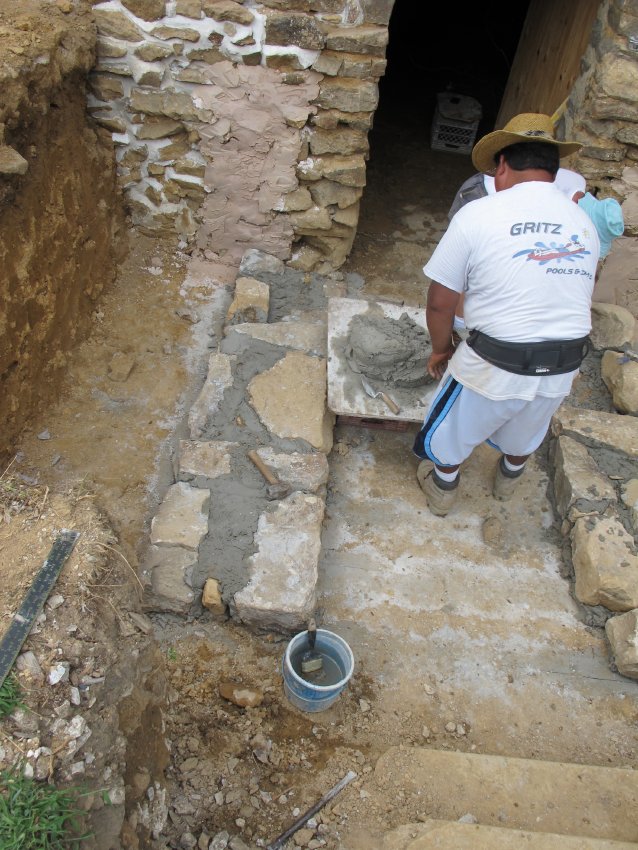
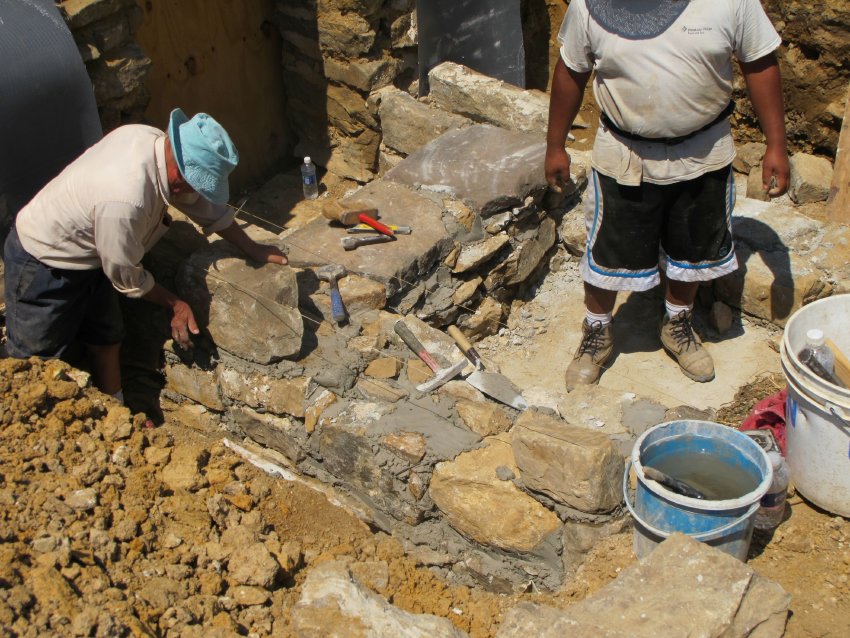
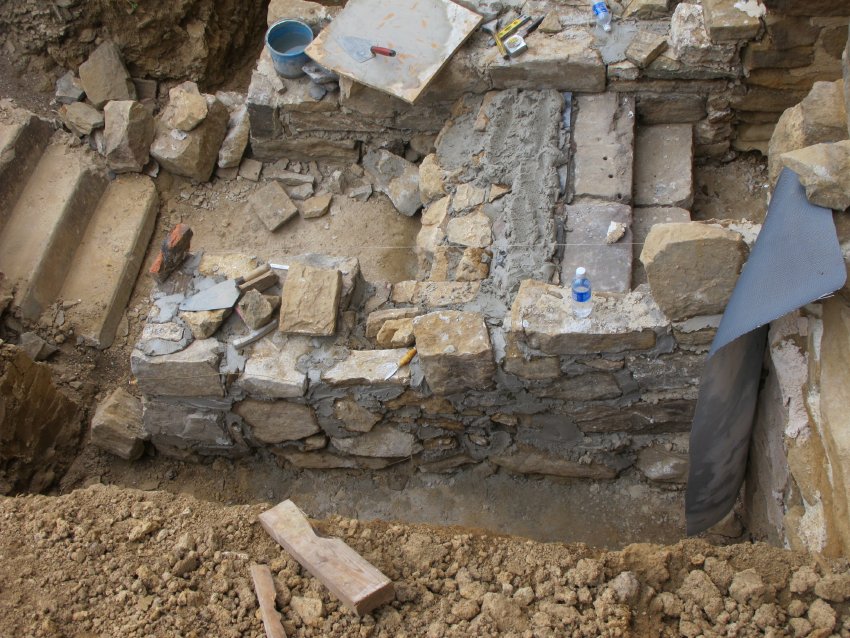
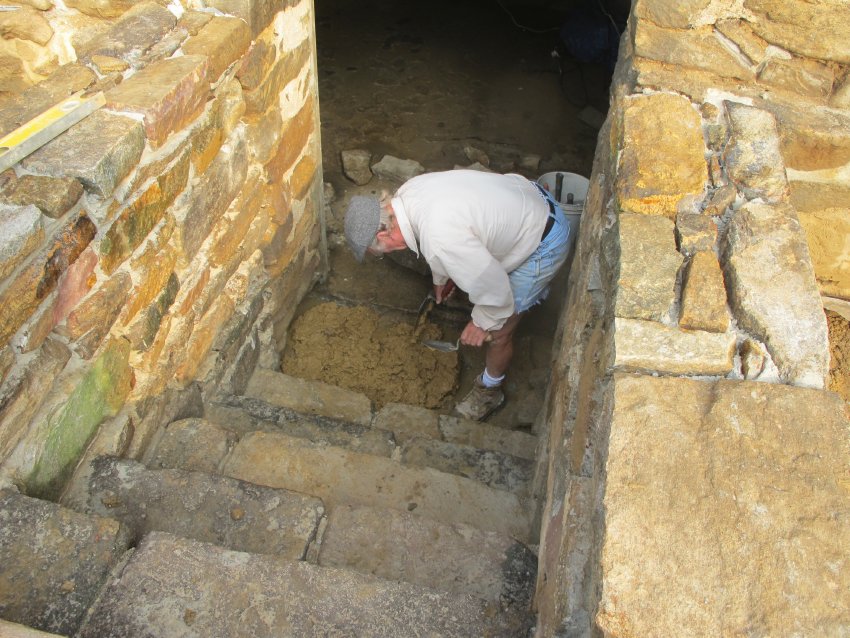
#31, photo 4982, 8/3/11: Mason laying up retaining walls and "mudding-in" rubble support core for treads bedded into the flanking walls
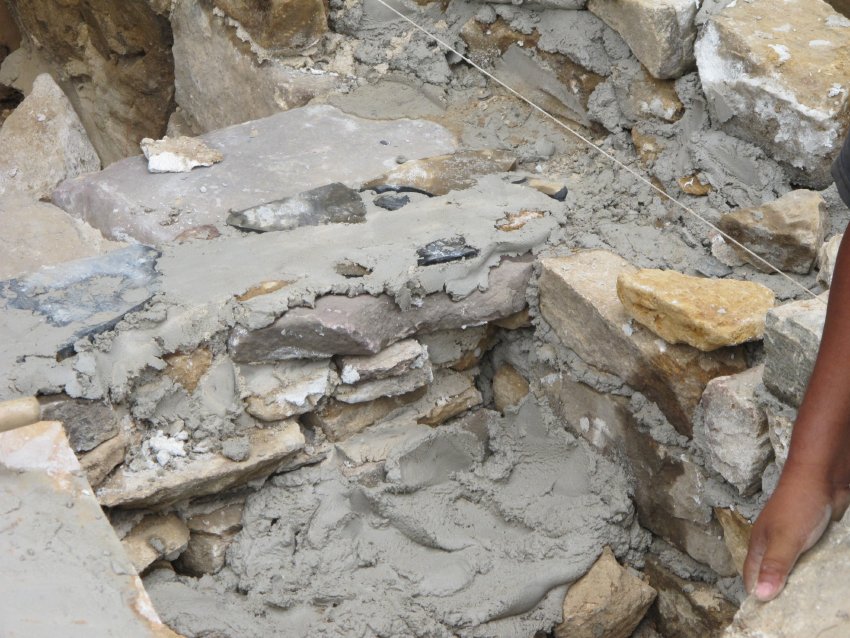
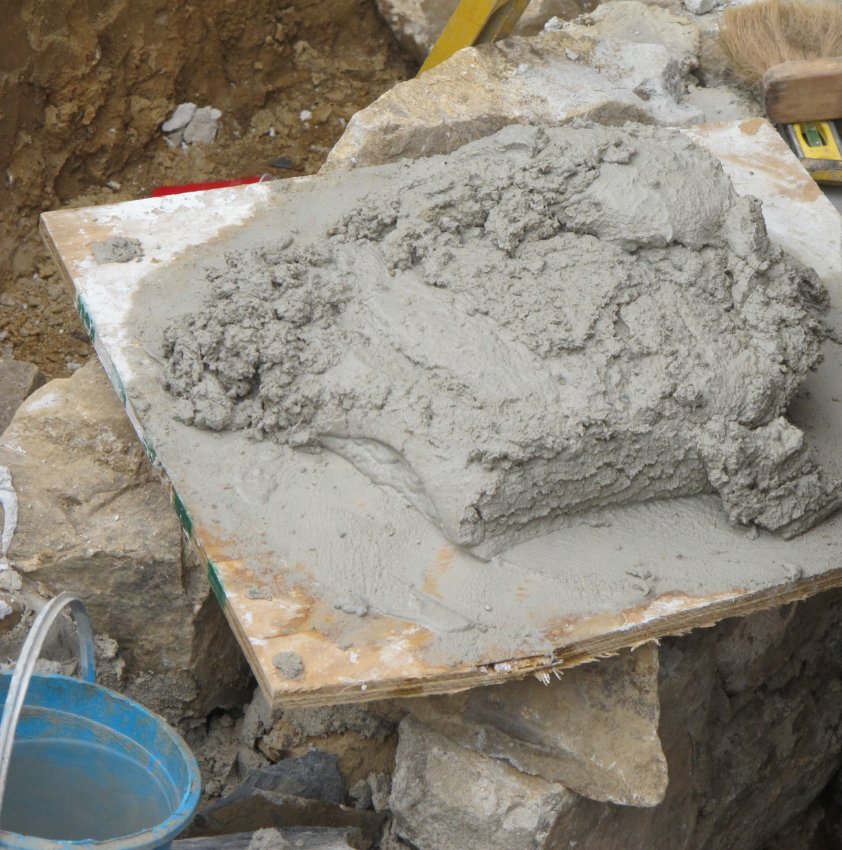
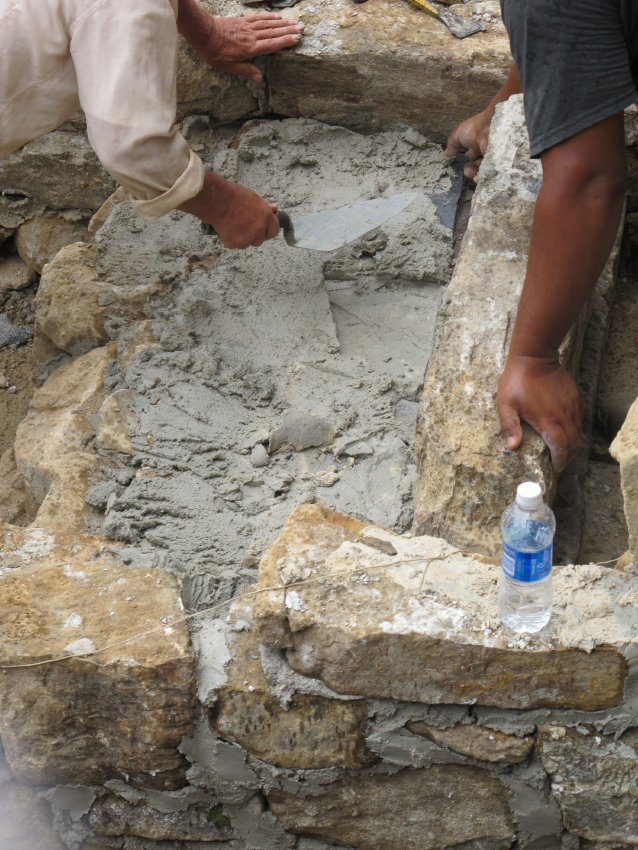
#32, photo 4987, 8/3/11: bed mortar for T3 and bed-stones
#33, photo 4999, 8/3/11: Mortar on mortar board; mix is 3 parts yellow bar sand, 1 part mason's lime, and ½ part Portland cement.
#34, photo 5004, 8/3/11: wall one course higher, treads bed-into adjacent wall
#35, photo 5010, 8/3/11: setting long tread stone
#36, 5013, 8/3/11: applying bed mortar for rubble core of steps.
#37, photo 5020, 8/3/11: tread-stone extending into retaining wall, creating structurally-monolithic wall-stair system.
#38, photo 5042, 8/4/11: three treads in place; 20th-century concrete cellar steps at top of photo.
#39, photo 5043, 8/4/11: Retaining walls and rubble masonry core.
#40, photo 5074, 8/5/11: Tread-stone T5A selected from stockpile of pier-stones
#41, photo 5085, 8/5/11: 2 tread-stones at levels 1-4, one tread-stone, pocketed into retaining wall at level 5.
#42, photo 5088, 8/5/11: detail of west retaining wall, tread stones and roughed-in west retaining wall.
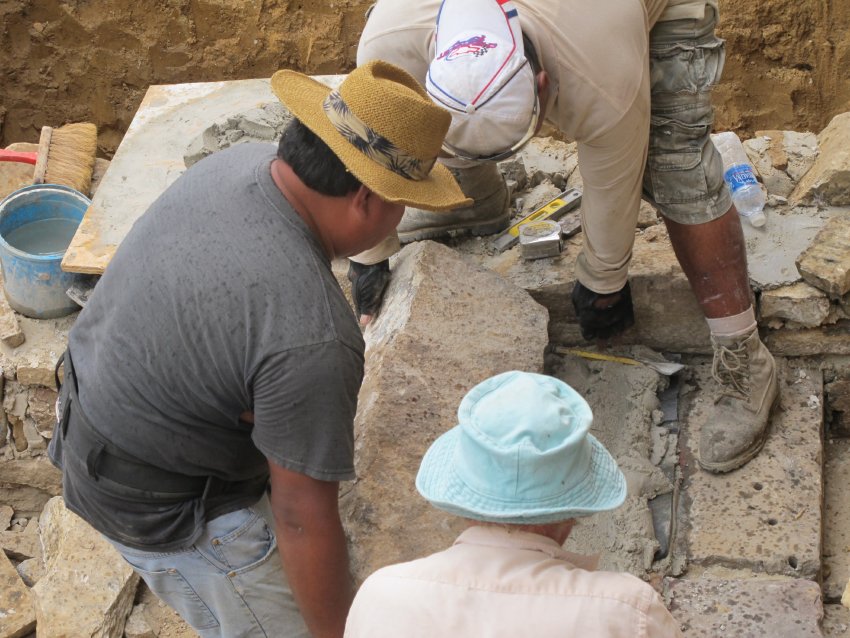
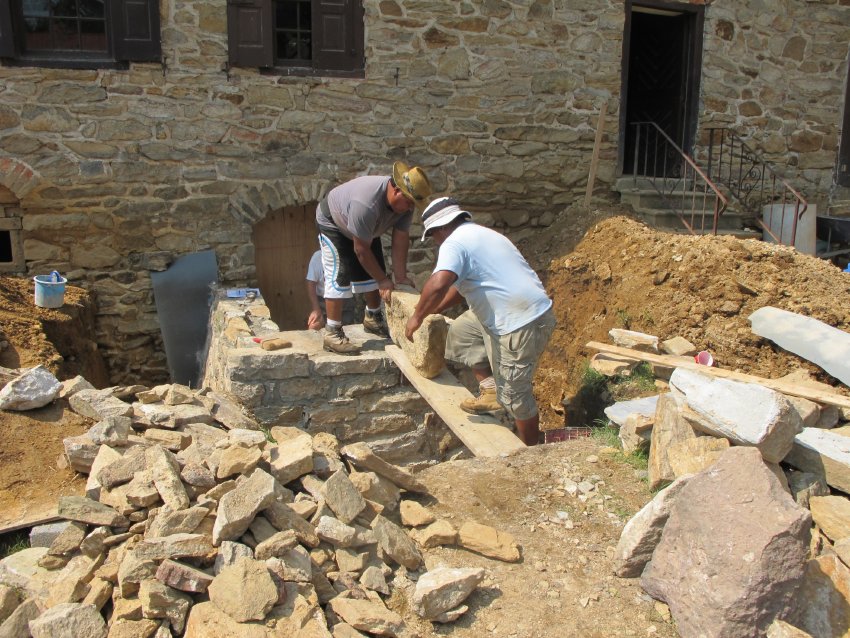
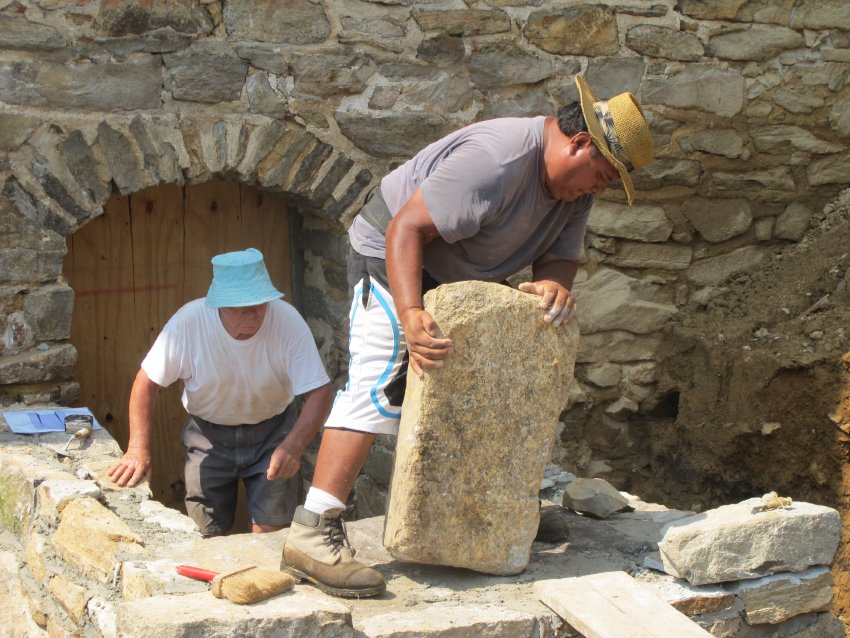
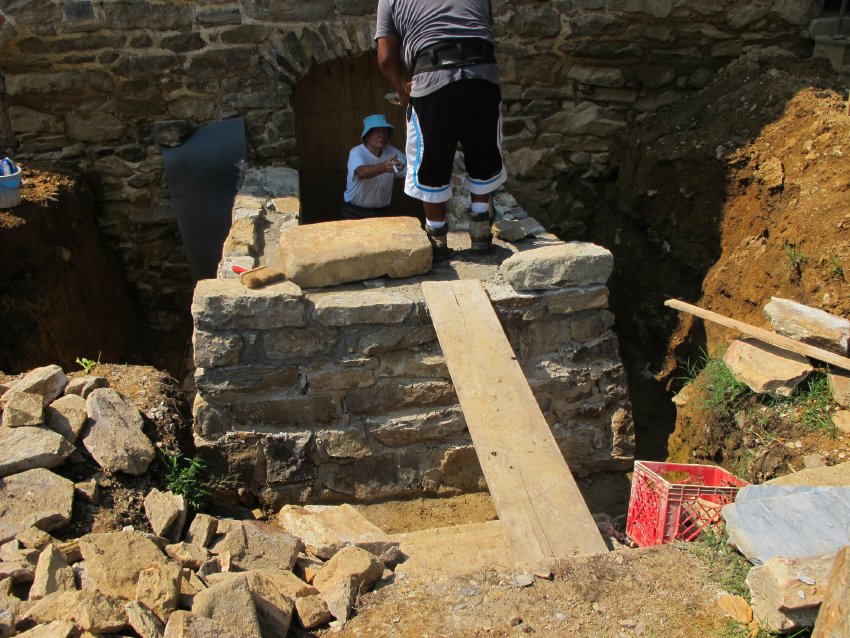
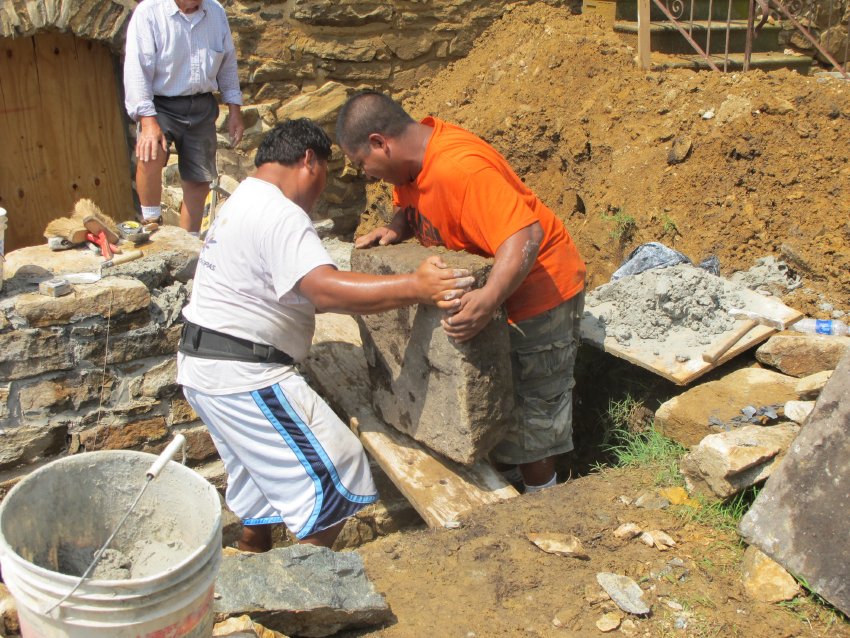
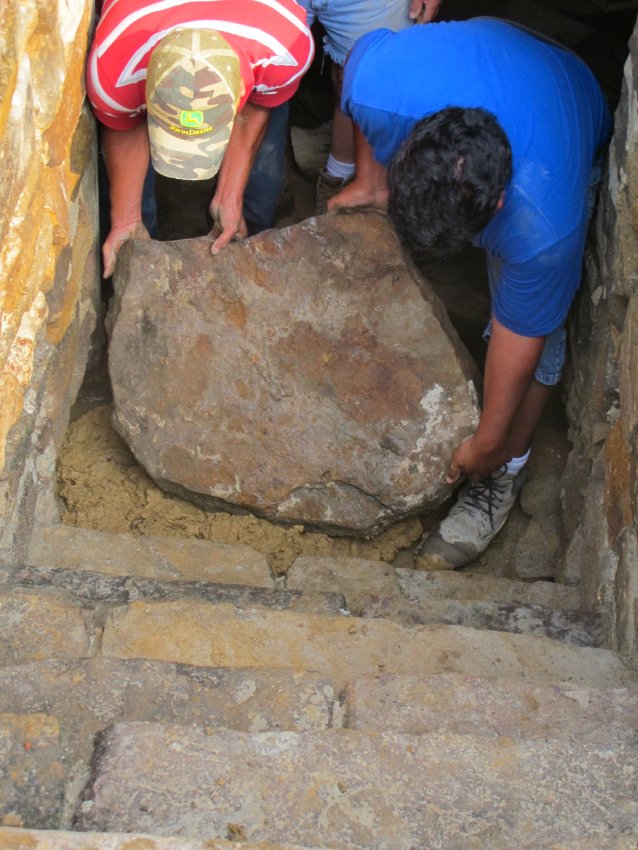
#43, photo 5142 and #44, photo 5143 8/8/11: man-handling large stone [T6A] into position; the two-stone treads will be sloped away from doorway to support the top landing stones sloped to the south to shed water running down the angled cellar doors.
#45, photo 5152, 8/8/11: Tread T6A set in place one riser below the top landing [L2] level; redness and scorch-marks suggest the possibility that this piece might have served as an early hearth-stone.
#46, photo 5156, 8/8/11: end-wall leveled ["flushed"] up to retaining wall elevation.
#47, 5159, 8/8/11: Masonry joint between east retaining wall and foundation plinth; lime mortar was applied to this joint, and a mesh fabric inserted between the early wall and the new structure to ensure that no non-period cementitious material would come in contact with the original foundation.
#48, photo 5169, 8/8/11: Flush joint between retaining wall and foundation. Only the inner wythes of the new wall were "toothed" into the foundation. "Bulkheads" added later display a roughly vertical mortar joint between the early and late masonry, not a bonded integration as replicated here.
#49, photo 5172, 8/8/11: Detail of intrados [inner surface of arch] and joint between retaining wall and doorway abutment; red mark on impost block indicates top of wall leveled with top of plinth on east [higher] flank of opening.
#50, 5191, 8/9/11: man-handling tread-stone up plank to position in stair-block.
#51, photo 5226, 8/9/11: Retaining walls and end-wall laid up to top tread [T6] level, and pitched to receive the upper landing stones.
#52, photo 5223, 8/10/11: Detail of landing stones gauged to 8-inch riser, with shims.
#53, photo 5244, 8/10/11: top landing stones set, leveled, and roughly squared to building wall.
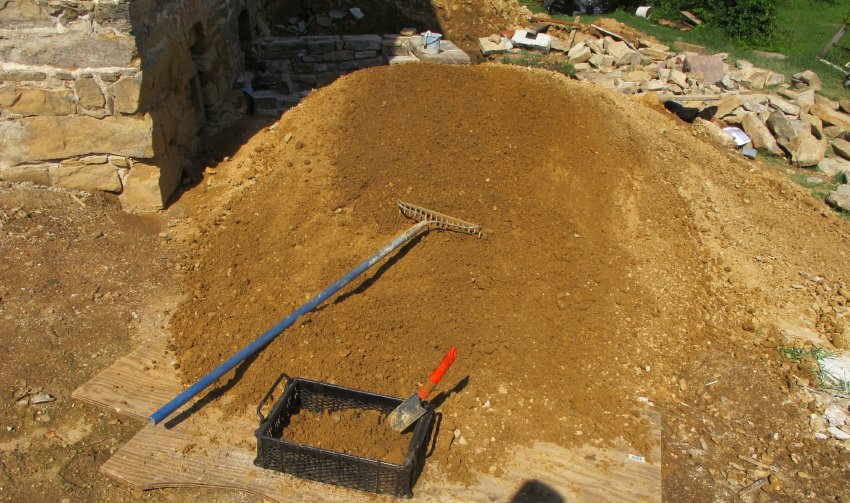
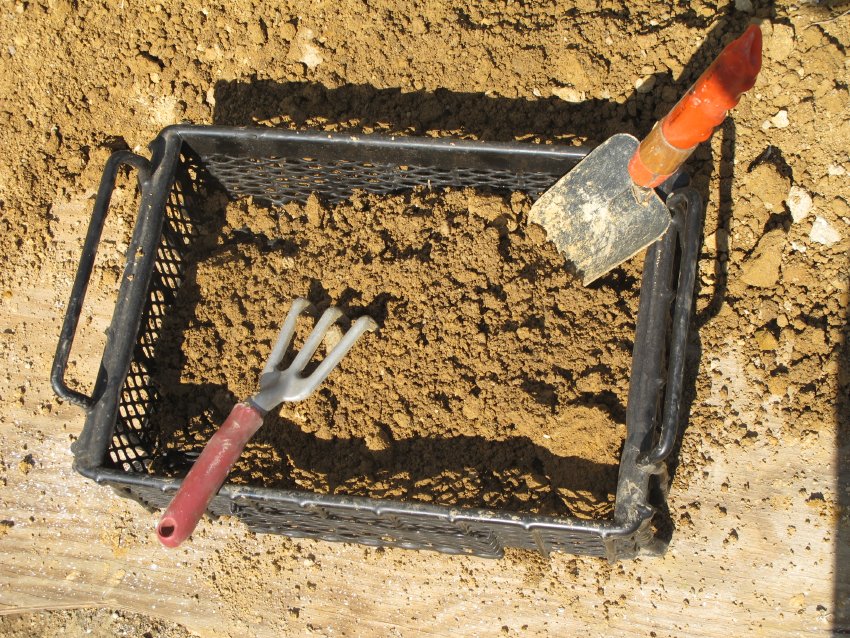
#54, photo 5246, 8/11/11: tray for screening excavated clay; no artifacts were found
#55, photo 5256, 8/11/11: detail of #54, photo 5246, with screening tray.
#56, photo 5249, 8/11/11: east retaining wall leveled with parallel string lines set into mortar with metal "pins".
#57, photo 5258, 8/12/11: West retaining wall after mortar-coating; south end-wall also pargeted and coated with water-based rubberized membrane waterproofing.
#58, 5334, 8/17/11: Walls leveled ["flushed up"]; top landing stones seen at bottom of photo.
#59, photo 5342, 8/18/11: Mason "puddling-in" clay to form bed for paving stones of lower landing; this technique involves saturating the clay to ensure that the "mud" flows efficiently into all voids.
#60, photo 5345, 8/18/11: setting pavers in lower landing.
#61, photo 5349, 8/18/11: landing stones at doorway sill "mudded-in".
#62, photo 5523: Cellarway retaining walls and upper landing prior to adjustment to support the planned wooden cellar cap and doors. Approach ramp is rough-graded.
##63, photo 5972 and #64, photo 5973, 9/13/11: Same stair segment as in #62, rectified to support mock-up of cellar cap, constructed to approximate the dimensions, orientation, and elevation of the final structure
#65, photo 5976: reconstructed cellar steps from lower landing.
#66, photo 5982: perspective view from grade, with mock-up cellar doors and supporting wood-framed cheek walls.
##67, photo 4628: Cellar entryway, showing plinth projection ["shelf"].
#68, photo 4648: cellar entry east plinth concrete steps to kitchen door to be removed.
#69, Arch Forces sketch.
#70, photo 5332, temporary "tympanum" centering support for root cellar entry.
#71, photo 4572, stones found on site to be used for cellar steps and walls.
END-NOTES:
{1} i.e., battened [Lounsbury, editor, An Illustrated Glossary of Early Southern Architecture and Landscape, University Press of Virginia (1999), p. 210, citing the use of "ledg'd" in a 1746 specification regarding doors in a prominent house in Charleston, South Carolina]; see also Gwilt, Encyclopedia of Architecture (1867 edition), defining "ledges" on doors as "horizontal planks in common doors to which the vertical planks are nailed".
{2} Clear of sap and thus the most durable timber sawn from the log, sometimes called "heartwood"
{3} In 18th-century building practice, the term "cheek" referred to the triangular side walls of an architectural element such as "the side of a dormer window(e) or cellar entrance" [Lounsbury, Carl L., pp. 72-73, citing a 1779 Delaware Court order requiring a guardian to "make new cheeks and door to the cellar."
(e) For example, the shingled triangular cheek on the "flat-topped" [pitched shed-form] dormer shown on Plate VIII of the Carpenters' Company Rules. Shingles are not mentioned as a sheathing option in the descriptions of cellar doorway "cheeks," a rational omission given that dormers are roof elements, and most roofs were shingled.
{4} "Bulkhead" is not used in the 1786 Philadelphia Carpenters' "Rules" or in the 1797 Chester County Carpenters' Directory. Lounsbury, p. 53, says "the term [bulkhead] only appeared in the mid-19th century, chiefly in New England." Lounsbury, p. 68, defines "cellar cap" as an "enclosed outside entrance with sloping doors leading into a cellar," citing a 1764 agreement which called for cellar caps on a Williamsburg, VA dwelling.
Submitted for Sites and Structures Committee by Laurence Ward, August 2011; updated November, 2016, and February, 2021.
Catalog details
- Catalog number
- 1002.01.087
- Alternate number
- KHPH19
- Accession number
- 1002.01
- Date
- August 2011
- Creator
- Ward, Laurence
- Object name
- Print, Photographic
- Record type
- Standard
- Classification
- Documentary Artifact
People
Subjects and search terms
Open-wayArchCellar doorsKeim PhotoDormerArch ForcescellarwayRiserKPHBattened doorKHPHKeim House PhotoPorch pierCarpenter's DirectoryplinthGeo-fabricImpostcellar stepsCarpenters' CompanyLanding stoneCenteringPuddlingConcrete removalGeo-degradableHookKHCheek wallscellar capCarpenter's Company RulesPintlePargetingtread stonebond stoneCellar EntryLedged doorBattenSpringerBulkhead EntryintradosLime MortarRetaining WallVoussoir